
With the evolution of cloud technologies and the DevOps culture, we must consider both speed and quality while migrating applications from our codebase to our cloud platform.
In this article, we will deploy a sample flask application to AWS Elastic Container Service (ECS), then set up continuous deployment of our application from GitHub to ECS using Amazon CodePipeline. We will manage the infrastructure and deployment using Terraform.
Ideally, you’re at least a bit comfortable with cloud and DevOps concepts and also have some background knowledge of using AWS services. Either way, let’s jump right in.
Table of contents
Prerequisites
- Access to the AWS platform (a trial account works fine)
- Usable VPCs and Subnets on AWS (You can check out how to set up VPCs and Subnets on AWS.)
- AWS ECR Repository (we’ll talk about this a bit)
- Terraform
- A flask application and its Dockerfile (we’ll talk about this a bit)
Architecture Overview
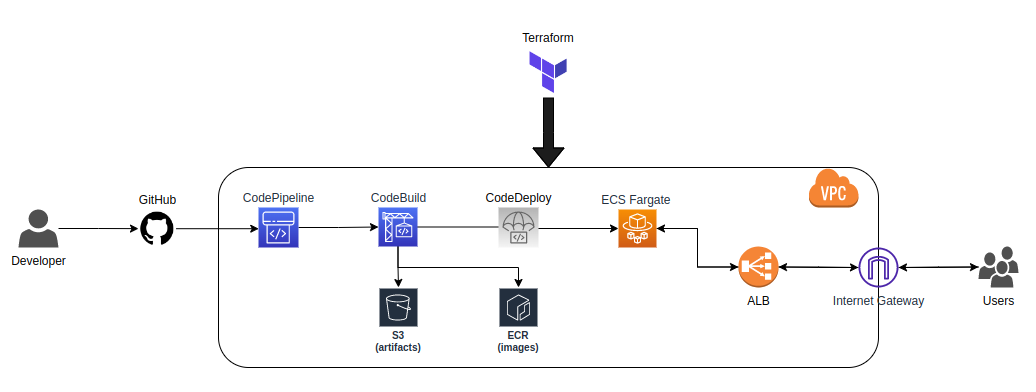
The major components of our implementation here are:
- GitHub to house the source code
- ECR to host the docker image
- ECS to host the deployed application. A good alternative would also be EBS.
- CodePipeline to continuously deploy future versions of our application
- Terraform to manage the provisioning of our resources easily
Great, let’s dive right in.
The code written in this AWS ECS tutorial can be found here.
Elastic Container Service (ECS) - Amazon ECS is a fully managed container orchestration service that helps you quickly deploy, manage, and scale containerized applications. It deeply integrates with the rest of the AWS platform to provide a secure and easy-to-use solution for running container workloads in the cloud and now on your infrastructure with Amazon ECS Anywhere.
Fargate - AWS Fargate is a technology that you can use with Amazon ECS to run containers without having to manage servers or clusters of Amazon EC2 instances. With Fargate, you no longer have to provision, configure, or scale clusters of virtual machines to run containers. This removes the need to choose server types, decide when to scale your clusters, or optimize cluster packing.
Elastic Container Registry - Amazon Elastic Container Registry (Amazon ECR) is an AWS-managed container image registry service that is secure, scalable, and reliable. Amazon ECR supports private repositories with resource-based permissions using AWS IAM.
CodePipeline - AWS CodePipeline is a continuous delivery service you can use to model, visualize, and automate the steps required to release your software. You can quickly model and configure the different stages of a software release process. CodePipeline automates the steps required to release your software changes continuously.
Terraform - Terraform is an infrastructure-as-code tool that lets you build, change, and version infrastructure safely and efficiently.

Part 1: Set Up ECS Using Terraform
We are taking the approach of provisioning our ECS cluster first because it makes more sense to have the destination ready before creating pipelines to automate deployments to them.
We would be creating three files in this stage.
- variables.tf to store all referenced variables
- provider.tf to configure our providers
- ecs.tf to configure our resources
- we can also have a backend.tf file to store our terraform state configuration on the cloud (e.g. on S3). This is best practice, but we don’t need this approach here.
If you’re unfamiliar with using Terraform AWS, you can check out how to start here.
variables.tf
variable "aws_region" {
  default = "<region>"
}
variable "vpc_id" {
  default = "<vpc-id>"
}
variable "subnets" {
  type = list(string)
  default = [
    "subnet-<subnet-1>",
    "subnet-<subnet-2>",
    "subnet-<subnet-n>"
  ]
}
variable "image_tag" {
  default = "latest"
}
variable "image_repo_url" {
  default = "<account-id>.dkr.ecr.<region>.amazonaws.com/<repository>"
}
This shows us some of our dependencies.
Firstly, to successfully provision our ECS cluster, we need to have a VPC and subnets to associate with our ECS resources. We have one of 2 options when using Terraform:
- Provision a VPC and subnets using Terraform and dynamically associate it to all resources.
- Use a pre-configured VPC and subnets.
In our case, we chose the 2nd option mostly to focus on the actual goal of this tutorial (AWS Continuous Deployment).
You can check out how to work with VPCs and Subnets on AWS.
Secondly, since it uses containers for application ECS deployment, we need to push our image to a container registry (e.g., Docker Hub, Google Container Registry (GCR), Elastic Container Registry (ECR)) and fetch it from there to ECS. In this tutorial, we push our images ECR.
To do this, we need to create an ECR repository (private or public).
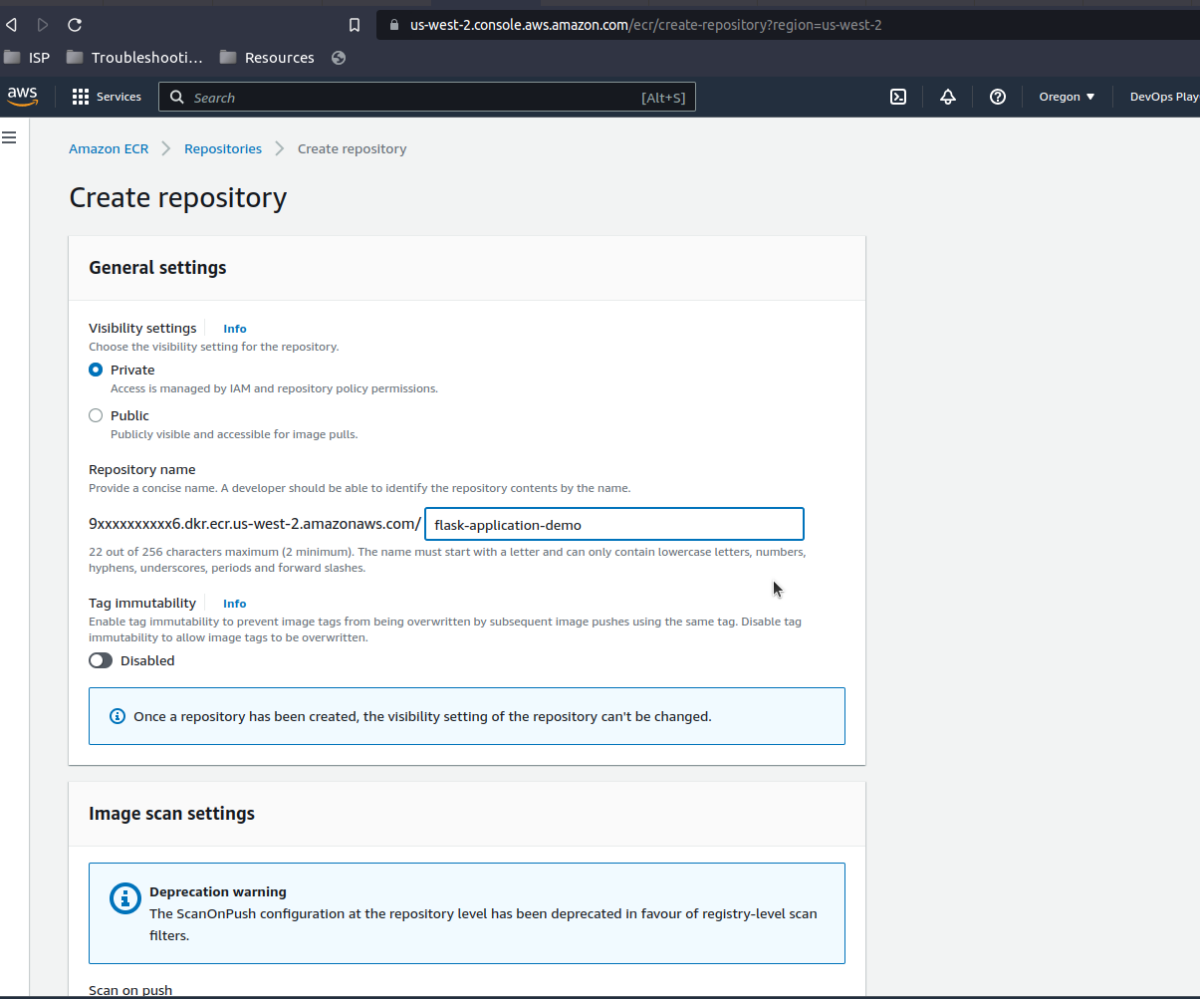
This full URL should be set as our image_repo_url variable above.
Whenever we build and push a new version of our image, we tag the image. In this tutorial, we will always set the new version tag as latest, which will overwrite the previously pushed version. This is why we’ve set the image_tag variable as latest.
So now we have all the variables required to create our ECS cluster.
provider.tf
provider "aws" {
  region = var.aws_region
}
For CICD terraform to use this configuration properly, we should ensure we are logged in to our AWS environment locally. To confirm, run:
$ aws configureMore info on using the AWS CLI can be found here.
ecs.tf
resource "aws_ecs_cluster" "flask_app_demo" {
  name = "flask-app-demo"
}
resource "aws_ecs_task_definition" "flask_app_demo" {
  family                   = "flask-app-demo"
  network_mode             = "awsvpc"
  requires_compatibilities = ["FARGATE"]
  cpu                      = "256"
  memory                   = "512"
  container_definitions = <<DEFINITION
[
  {
    "name": "flask-app-demo",
    "image": "${var.image_repo_url}:${var.image_tag}",
    "essential": true,
    "portMappings": [
      {
        "containerPort": 5000,
        "hostPort": 5000
      }
    ],
    "logConfiguration": {
      "logDriver": "awslogs",
      "options": {
        "awslogs-group": "${aws_cloudwatch_log_group.flask_app_demo.name}",
        "awslogs-region": "${var.aws_region}",
        "awslogs-stream-prefix": "flask-app-demo"
      }
    }
  }
]
DEFINITION
  execution_role_arn = aws_iam_role.task_definition_role.arn
  runtime_platform {
    operating_system_family = "LINUX"
    cpu_architecture        = "X86_64"
  }
}
resource "aws_cloudwatch_log_group" "flask_app_demo" {
  name = "/ecs/flask-app-demo"
}
resource "aws_ecs_service" "flask_app_demo" {
  name            = "flask-app-demo"
  cluster         = aws_ecs_cluster.flask_app_demo.id
  task_definition = aws_ecs_task_definition.flask_app_demo.arn
  desired_count   = 1
  launch_type     = "FARGATE"
  network_configuration {
    subnets         = var.subnets
    security_groups = [aws_security_group.flask_app_demo.id]
    assign_public_ip = true
  }
  load_balancer {
    target_group_arn = aws_lb_target_group.flask_app_demo.arn
    container_name   = "flask-app-demo"
    container_port   = 5000
  }
}
resource "aws_security_group" "flask_app_demo" {
  name        = "flask-app-demo"
  description = "Allow inbound traffic to flask app"
  vpc_id      = var.vpc_id
  ingress {
    description      = "Allow HTTP from anywhere"
    from_port        = 0
    to_port          = 0
    protocol         = "-1"
    cidr_blocks      = ["0.0.0.0/0"]
    ipv6_cidr_blocks = ["::/0"]
  }
   egress {
    from_port        = 0
    to_port          = 0
    protocol         = "-1"
    cidr_blocks      = ["0.0.0.0/0"]
    ipv6_cidr_blocks = ["::/0"]
  }
}
resource "aws_lb_target_group" "flask_app_demo" {
  name        = "flask-app-demo"
  port        = 5000
  protocol    = "HTTP"
  vpc_id      = var.vpc_id
  target_type = "ip"
  health_check {
    path                = "/"
    interval            = 30
    timeout             = 10
    healthy_threshold   = 2
    unhealthy_threshold = 2
  }
}
resource "aws_lb" "flask_app_demo" {
  name               = "flask-app-demo"
  internal           = false
  load_balancer_type = "application"
  security_groups    = [aws_security_group.flask_app_demo.id]
  subnets            = var.subnets
  enable_deletion_protection = false
  tags = {
    Name = "flask-app-demo"
  }
}
resource "aws_lb_listener" "flask_app_demo" {
  load_balancer_arn = aws_lb.flask_app_demo.arn
  port              = "80"
  protocol          = "HTTP"
  default_action {
    type             = "forward"
    target_group_arn = aws_lb_target_group.flask_app_demo.arn
  }
}
resource "aws_lb_listener_rule" "flask_app_demo" {
  listener_arn = aws_lb_listener.flask_app_demo.arn
  priority     = 1
  action {
    type             = "forward"
    target_group_arn = aws_lb_target_group.flask_app_demo.arn
  }
  condition {
    path_pattern {
      values = ["/"]
    }
  }
}
resource "aws_iam_role" "task_definition_role" {
  name = "flask_demo_task_definition"
  assume_role_policy = <<EOF
{
  "Version": "2012-10-17",
  "Statement": [
    {
      "Action": "sts:AssumeRole",
      "Principal": {
        "Service": "ecs-tasks.amazonaws.com"
      },
      "Effect": "Allow",
      "Sid": ""
    }
  ]
}
EOF
}
resource "aws_iam_role_policy" "task_definition_policy" {
  name = "flask_demo_task_definition_policy"
  role = aws_iam_role.task_definition_role.id
  policy = <<EOF
{
  "Version": "2012-10-17",
  "Statement": [
    {
      "Effect": "Allow",
      "Action": [
        "ecr:BatchCheckLayerAvailability",
        "ecr:GetAuthorizationToken",
        "ecr:GetDownloadUrlForLayer",
        "ecr:BatchGetImage",
        "logs:CreateLogStream",
        "logs:PutLogEvents",
        "secretsmanager:GetSecretValue",
        "ssm:GetParameters"
      ],
      "Resource": [
        "*"
      ]
    }
  ]
}
EOF
}
Let’s discuss what these blocks mean.
We have three categories of configuration here:
- ECS-specific configuration
- Network-related configuration
- IAM-related configuration
ECS-Specific Configuration
Line 1 - Line 58 covers the configuration of resources specific to creating an ECS cluster.
In L1-L3, we create a cluster named flask-app-demo.
An Amazon ECS cluster is a logical grouping of tasks or services. Your tasks and services are run on infrastructure that is registered to a cluster. The infrastructure capacity can be provided by AWS Fargate, which is a serverless infrastructure that AWS manages, Amazon EC2 instances that you manage, or an on-premise server or virtual machine (VM) that you manage remotely. In most cases, Amazon ECS capacity providers can be used to manage the infrastructure that the tasks in your clusters use.
Its Terraform resource can be found here.
In L4-L38, we create a task definition.
A task definition is required to run Docker containers in Amazon ECS.
Its Terraform resource can be found here.
More information can be found on the task definition parameters here.
The requires_compatibilities property must be set to FARGATE as this would ensure we validate the task definition against the FARGATE launch type.
In L39-L41, we create the CloudWatch log group responsible for monitoring our cluster.
In L42-L58, we create an ECS service.
You can use an Amazon ECS service to run and maintain a specified number of instances of a task definition simultaneously in an Amazon ECS cluster. If one of your tasks fails or stops, the Amazon ECS service scheduler launches another instance of your task definition to replace it.
Its Terraform resource can be found here.
Again, it would be worth taking note of the launch_type being FARGATE as this would ensure we deploy our application to AWS Fargate service.
There are various reasons why we are choosing Fargate but it’s mostly because it’s easy to manage in the future (it removes a lot of overhead in managing infrastructure and allows us to focus on our application).
Network-related configuration
Network-Related Configuration
In L59-L125, we configure the AWS security group Terraform - where we decide how to expose our network to incoming and outgoing traffic. The terraform resource can be found here.
We also configure load-balancing-related resources to decide how we listen for traffic and create an application load balancer. Its Terraform resource(s) can be found here.
IAM-Related Configuration
In L126-L170, we configure permission-related resources majorly for ECS to be able to interact with ECR and also for logging.
Apply configuration to AWS
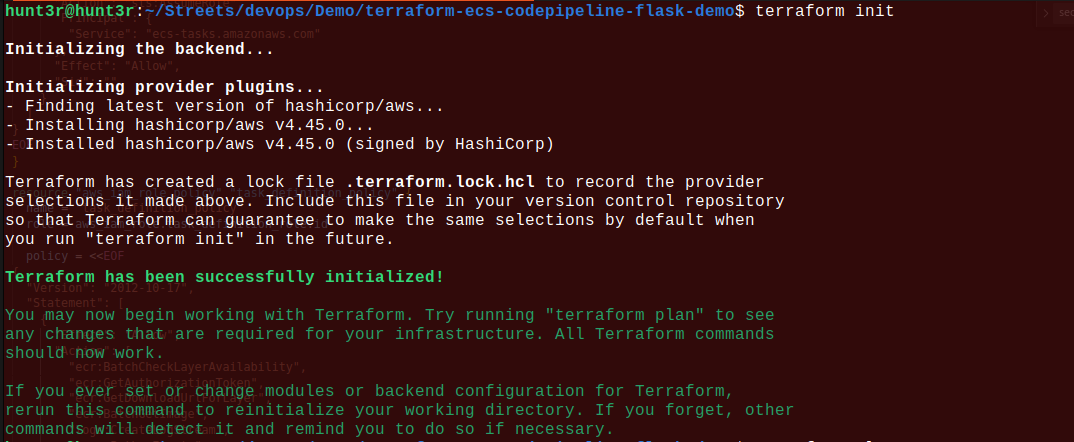
- Initialize the directory
$ terraform init
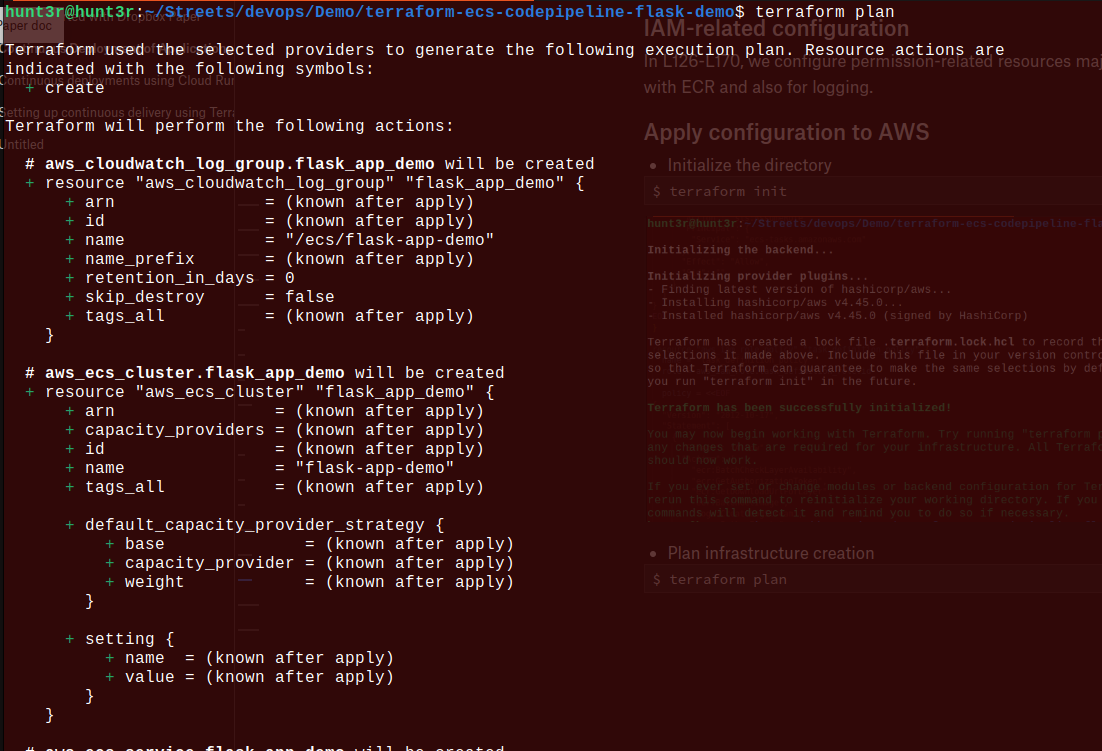
- Plan infrastructure creation
$ terraform plan

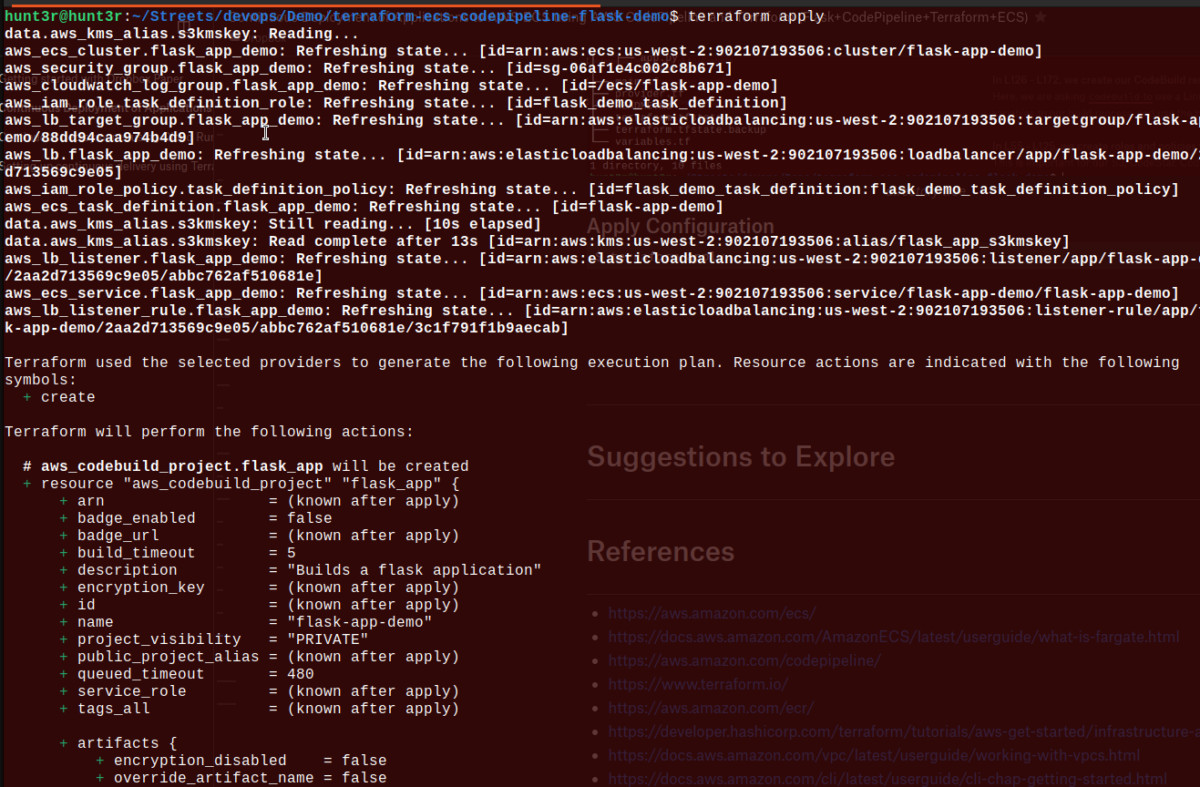
- Apply the configuration
$ terraform apply
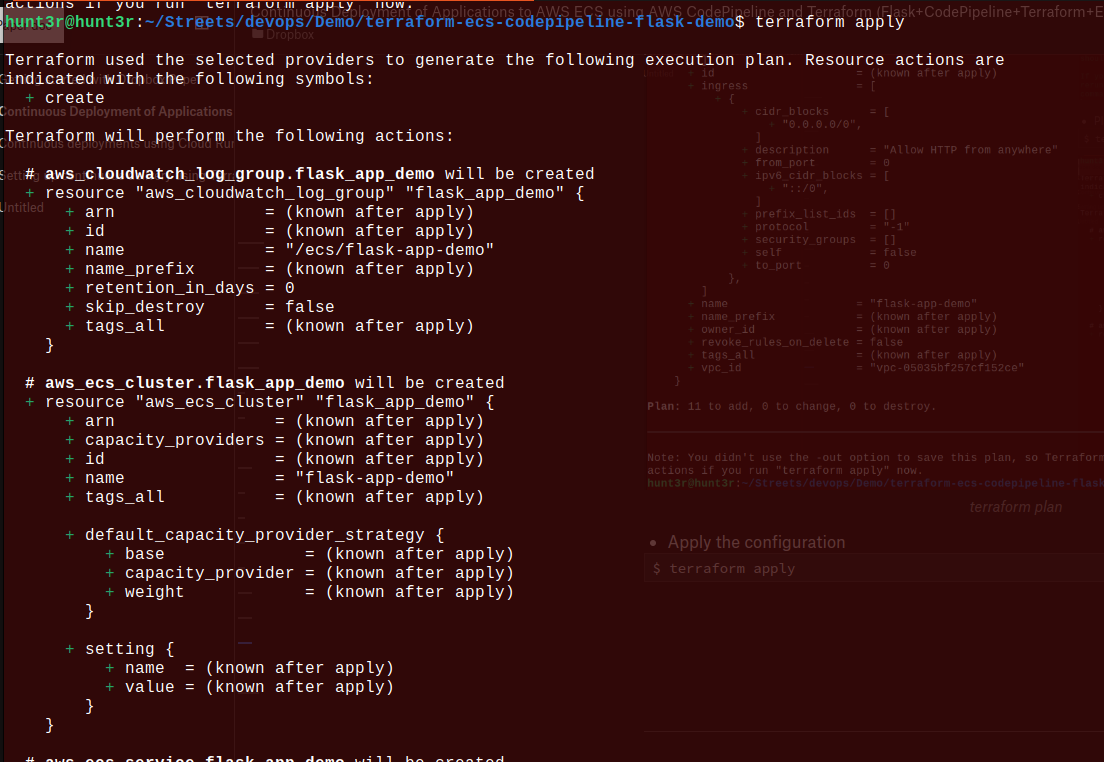
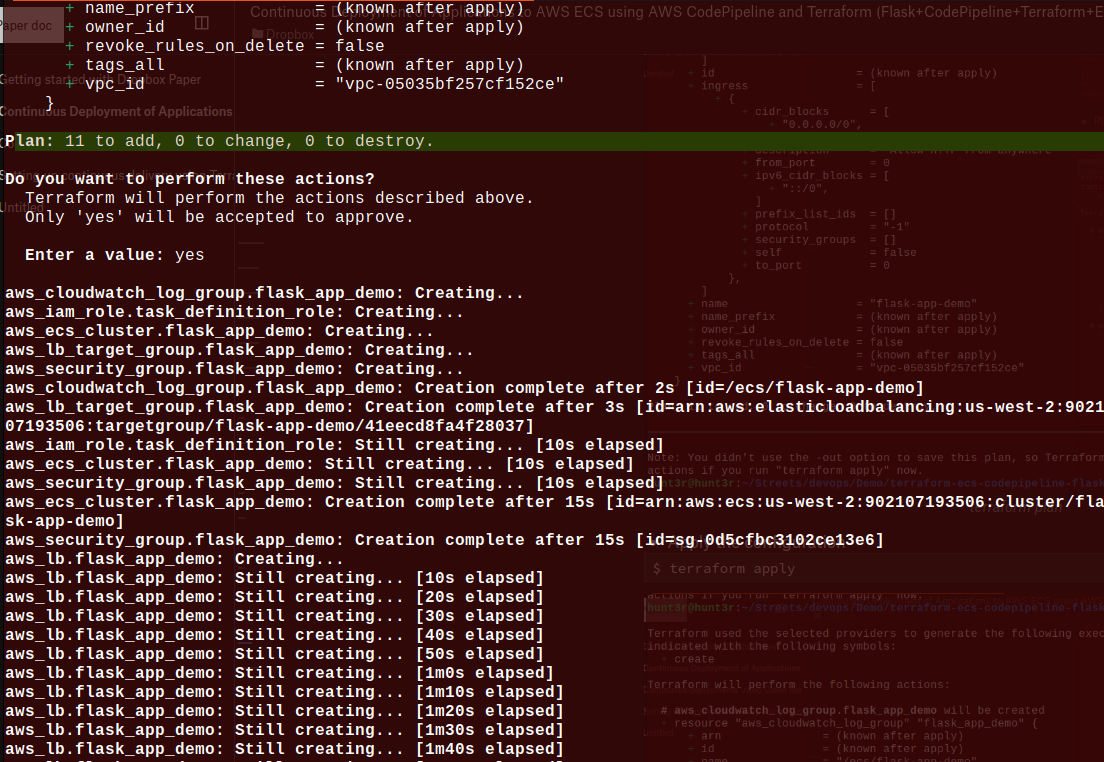
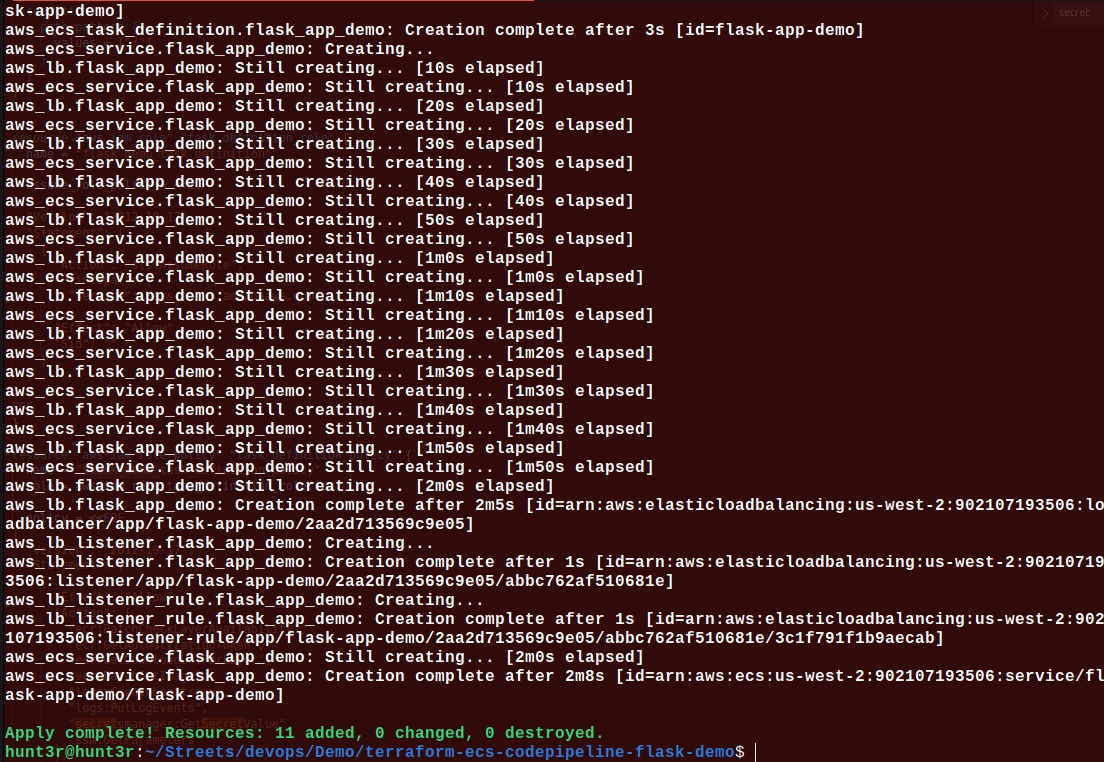
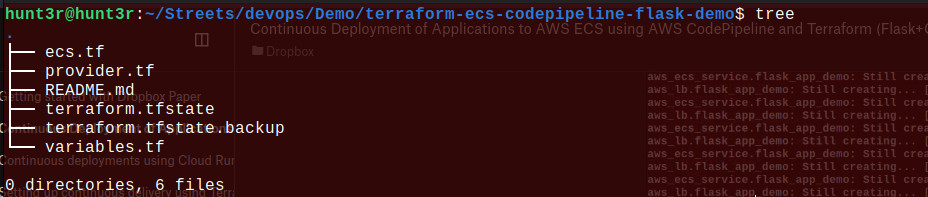
We’ll notice Terraform has generated some files.
Verify Implementation
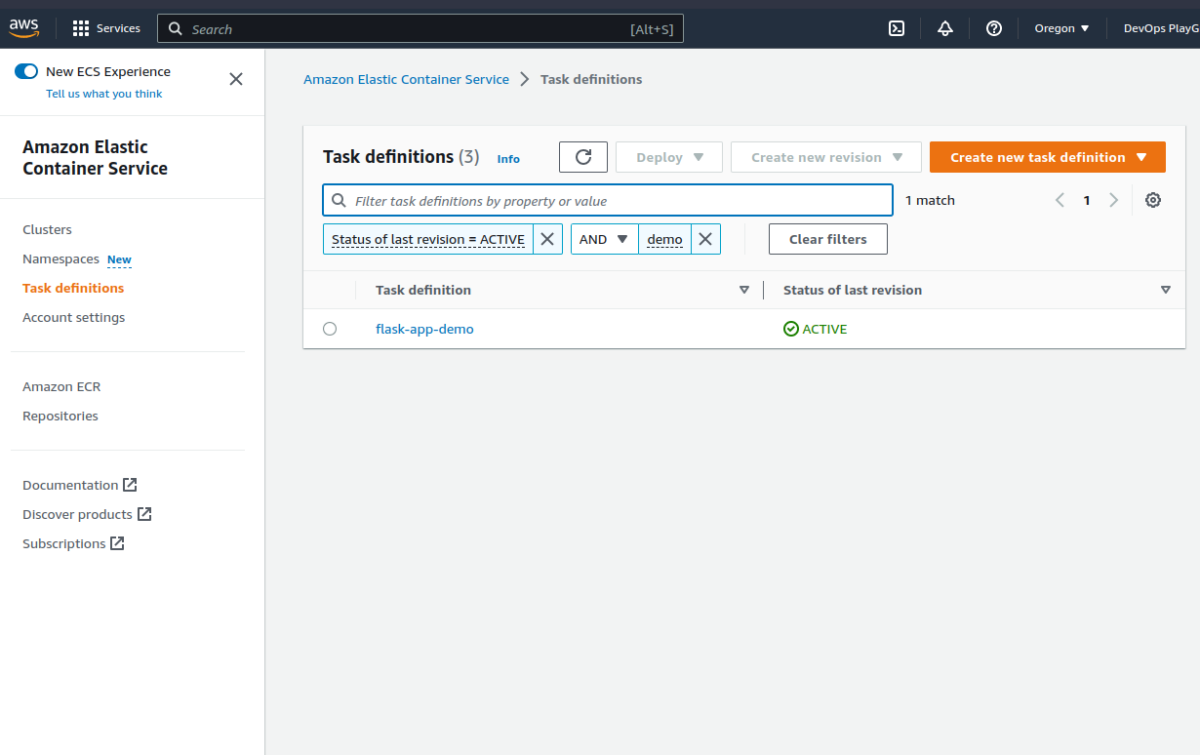
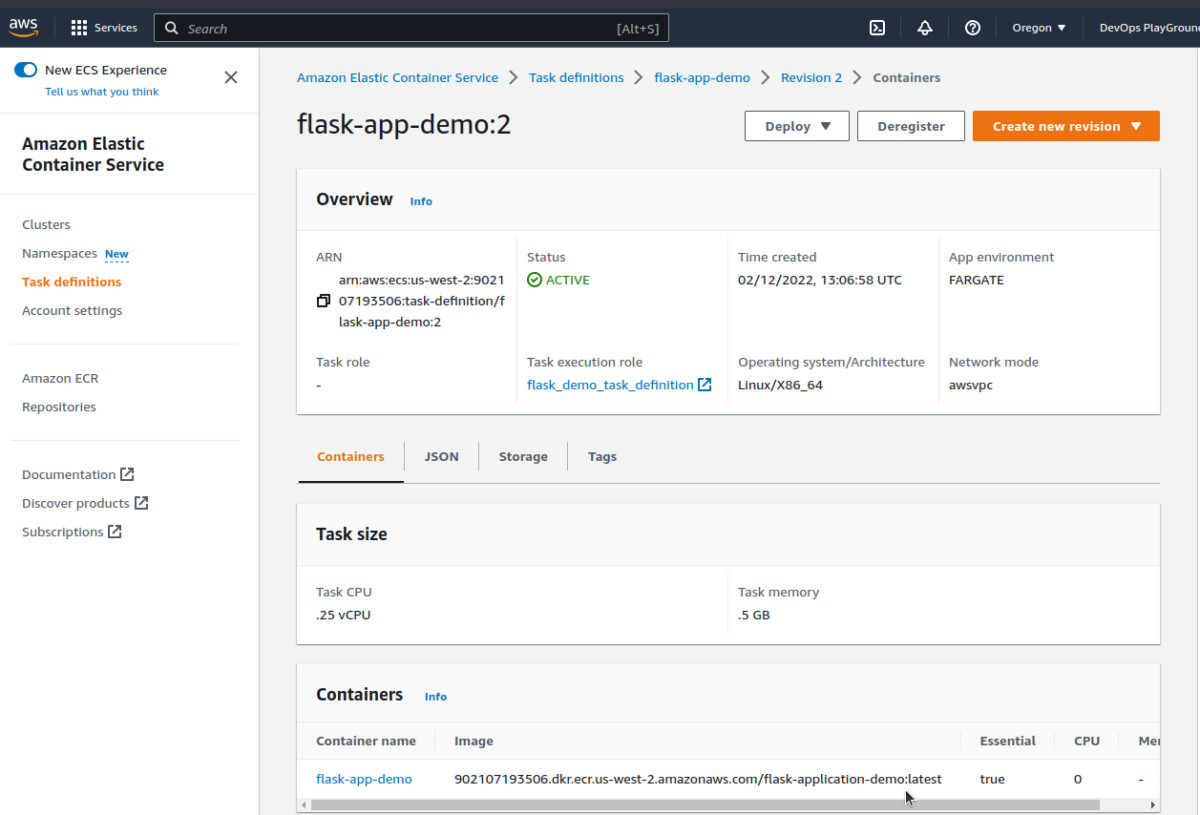
We can see the task definition is linked to the correct image in ECR. This won’t work yet though as we have not yet pushed our flask application into it.
Note: you must be careful about which information you expose.
Let’s deploy!
Part 2: Set up CodePipeline using Terraform
The Application
We’ll set up a basic Flask application and dockerize it.
Running the app locally.
- Install flask
$ pip install flask
- Create flask app
flask_app/app.py
from flask import Flask
app = Flask(__name__)
@app.route("/")
def hello():
    return "Yayy, we have the 1st version of our flask application"
if __name__ == "__main__":
app.run(host="0.0.0.0")- Running the app
$ python3 flask_app/app.py
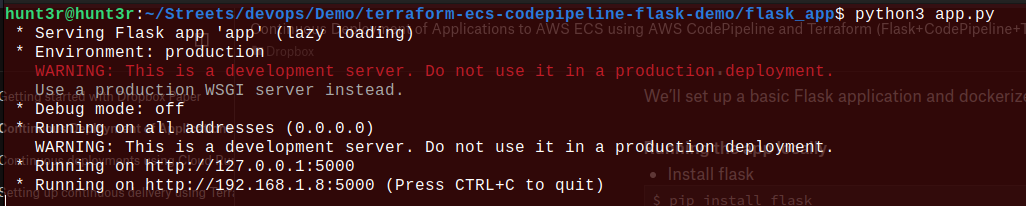
- Visit http://127.0.0.1:5000
Dockerizing the app.
- Create a
Dockerfile
flask_app/Dockerfile
FROM public.ecr.aws/bitnami/python:3.9
RUN pip install flask
COPY app.py ./app.py
CMD ["python", "app.py"]Note: we did not use the conventional FROM python:3.8 in our 1st line because Docker hub has some download rate limit restrictions that may block our app from being built.
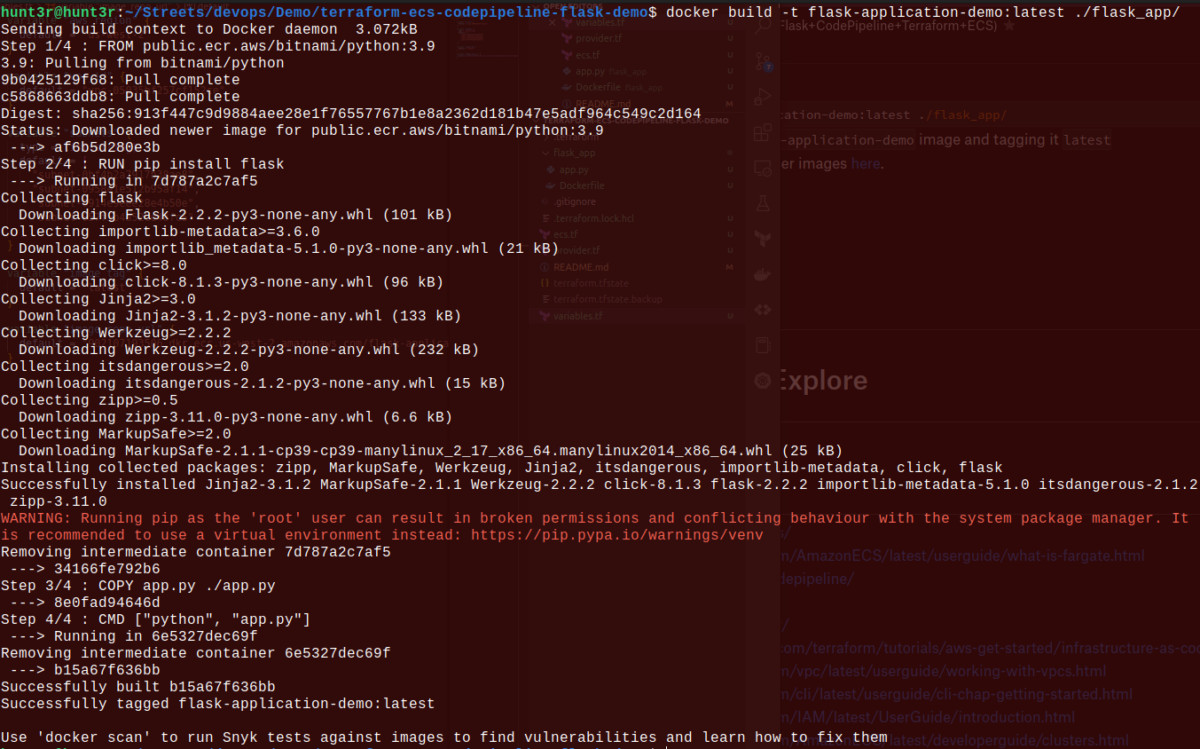
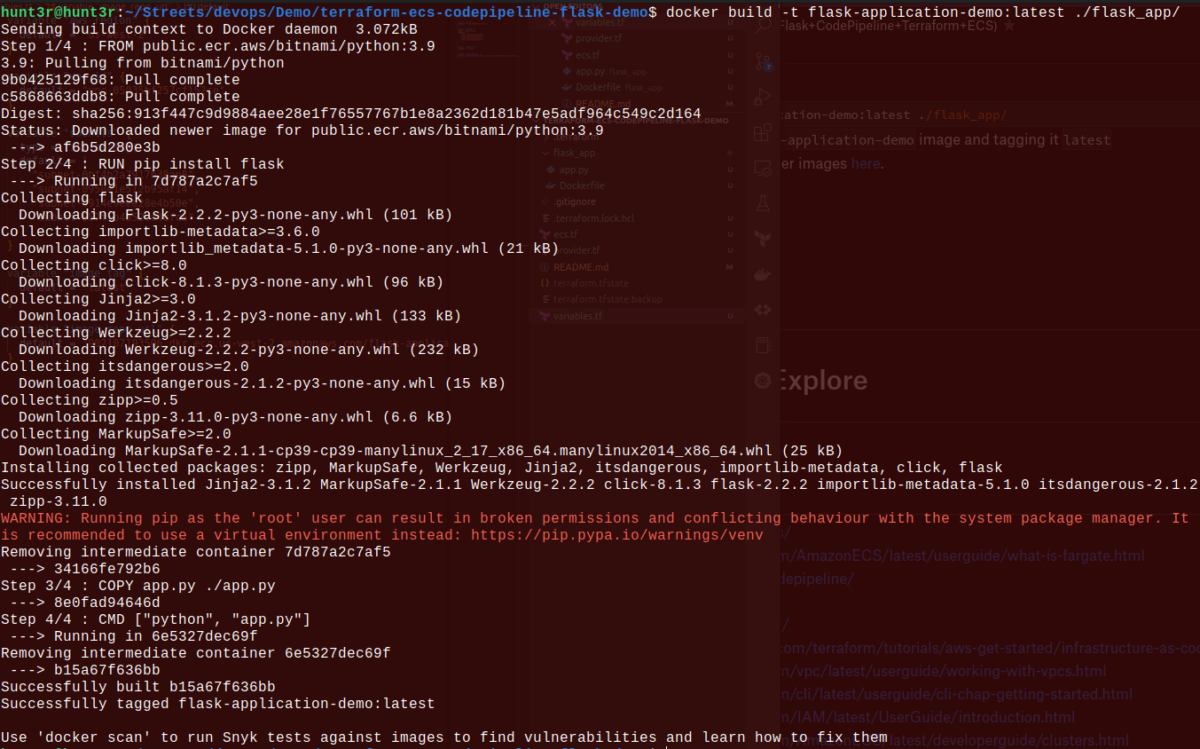
- Build the image
docker build -t flask-application-demo:latest ./flask_app/
Here, we are building the flask-application-demo image and tagging it latest.
Learn more about building docker images here.
- Confirm image has been built.
$ docker image ls

- Run the Docker container.
$ docker run -d -p 5000:5000 flask-application-demo

- Visit the localhost URL to confirm.

Now that we’ve set up the app locally, we can go ahead to set up our CodePipeline so that our app is built and deployed anytime we push it to GitHub.
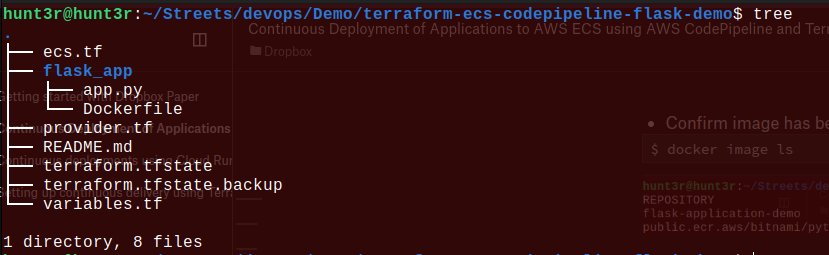
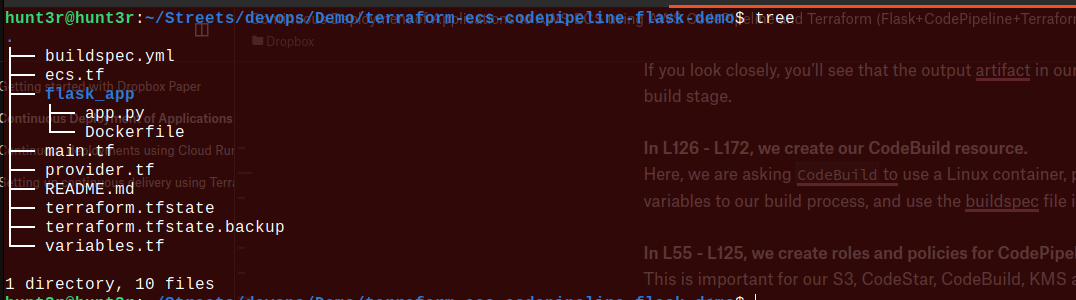
At this point, or directory tree looks like this:
The Buildspec
A buildspec (build specification) is a collection of build commands and related settings in YAML format that CodeBuild uses to run a build. You can learn more about buildspecs here.
Our use case for a buildspec would be to build our image as we did locally, push it to ECR, and update ECS task definition for the app to be deployed.
buildspec.yml
# Buildspec to pull the latest version of the Docker image from docker hub and deploy it to the ECS cluster
version: 0.2
phases:
  install:
    runtime-versions:
      docker: 18
  pre_build:
    commands:
      - echo Logging in to Amazon ECR....
      - echo $AWS_ACCOUNT_ID - $AWS_DEFAULT_REGION - $IMAGE_REPO_NAME - $IMAGE_TAG
      - aws --version
      - aws ecr get-login-password --region $AWS_DEFAULT_REGION | docker login --username AWS --password-stdin $AWS_ACCOUNT_ID.dkr.ecr.$AWS_DEFAULT_REGION.amazonaws.com
      - export REPOSITORY_URI=$AWS_ACCOUNT_ID.dkr.ecr.$AWS_DEFAULT_REGION.amazonaws.com/$IMAGE_REPO_NAME
      - echo Build started on `date`
      - echo Building the Docker image...
      - docker build -t $IMAGE_REPO_NAME:$IMAGE_TAG ./flask_app
      - docker tag $IMAGE_REPO_NAME:$IMAGE_TAG $REPOSITORY_URI:$IMAGE_TAG
  build:
    commands:
      - echo Pushing the Docker image to ECR...
      - echo $REPOSITORY_URI:$IMAGE_TAG
      - docker push $REPOSITORY_URI:$IMAGE_TAG
  post_build:
    commands:
      - echo Build completed on `date`
      - echo Deploying new task definition $IMAGE_TAG to ECS cluster...
      - echo ECS_CLUSTER_NAME - $ECS_SERVICE_NAME, ECS_SERVICE_NAME - $ECS_SERVICE_NAME
      - aws ecs update-service --cluster $ECS_CLUSTER_NAME --service $ECS_SERVICE_NAME --task-definition $ECS_TASK_DEFINITION --force-new-deployment
      - echo ECS service $ECS_SERVICE_NAME updated
Our buildspec is divided into 4 phases:
- install - install packages e.g. docker version 18 in our case.
- pre_build - here, we log in to ECR and build our image using the Dockerfile in the flask_app folder.
- build - here, we push our built image to ECR.
- post_build - here, we update our task definition and force ECS to redeploy our app based on the latest image in ECR.
We can see that we have some required variables to build and deploy our application, we will be covering that in the next section with CodePipeline.
Note: the activities in the buildspec take place in AWS CodeBuild.
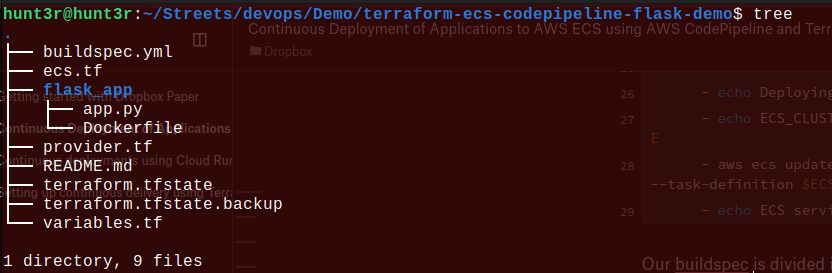
At this point, our directory tree looks like this:
The Pipeline
Our pipeline would be responsible for linking AWS to a GitHub repository, fetching our app from there, and building and deploying it based on our buildspec configuration.
Firstly, we need to add some new variables.
variables.tf
variable "aws_account_id" {
  default = "902107193506"
}
variable "aws_region" {
  default = "us-west-2"
}
variable "vpc_id" {
  default = "<vpc-id>"
}
variable "subnets" {
  type = list(string)
  default = [
    "subnet-<subnet-1>",
    "subnet-<subnet-2>",
    "subnet-<subnet-n>"
  ]
}
variable "image_repo_name" {
  default = "flask-application-demo"
}
variable "image_tag" {
  default = "latest"
}
variable "image_repo_url" {
  default = "<account-id>.dkr.ecr.<region>.amazonaws.com/<repository>"
}
variable "github_repo_owner" {
  default = "m3rryqold"
}
variable "github_repo_name" {
  default = "terraform-ecs-codepipeline-flask-demo"
}
variable "github_branch" {
  default = "main"
}
We’ve added a few more variables to use in CodePipeline, mostly for our GitHub repository. We’ll see the usage in the next step.
Next, we need to create our main.tf file.
main.tf
resource "aws_codepipeline" "codepipeline" {
name = "flask_demo_pipeline"
role_arn = aws_iam_role.codepipeline_role.arn
artifact_store {
location = aws_s3_bucket.codepipeline_bucket.bucket
type = "S3"
encryption_key {
id = data.aws_kms_alias.s3kmskey.arn
type = "KMS"
}
}
stage {
name = "Source"
action {
name = "Source"
category = "Source"
owner = "AWS"
provider = "CodeStarSourceConnection"
version = "1"
output_artifacts = ["source_output"]
configuration = {
ConnectionArn = aws_codestarconnections_connection.example.arn
FullRepositoryId = "${var.github_repo_owner}/${var.github_repo_name}"
BranchName = var.github_branch
}
}
}
stage {
name = "Build"
action {
name = "Build"
category = "Build"
owner = "AWS"
provider = "CodeBuild"
input_artifacts = ["source_output"]
output_artifacts = ["build_output"]
version = "1"
configuration = {
ProjectName = aws_codebuild_project.flask_app.name
}
}
}
}
resource "aws_codestarconnections_connection" "example" {
name = "flask-demo-connection"
provider_type = "GitHub"
}
resource "aws_s3_bucket" "codepipeline_bucket" {
bucket = "flask-demo-codepipeline-bucket"
}
resource "aws_s3_bucket_acl" "codepipeline_bucket_acl" {
bucket = aws_s3_bucket.codepipeline_bucket.id
acl = "private"
}
resource "aws_iam_role" "codepipeline_role" {
name = "flask_demo_codepipeline_role"
assume_role_policy = <<EOF
{
"Version": "2012-10-17",
"Statement": [
{
"Sid": "TrustPolicyStatementThatAllowsEC2ServiceToAssumeTheAttachedRole",
"Effect": "Allow",
"Principal": {
"Service": "codepipeline.amazonaws.com"
},
"Action": "sts:AssumeRole"
}
]
}
EOF
}
resource "aws_iam_role_policy" "codepipeline_policy" {
name = "flask_demo_codepipeline_policy"
role = aws_iam_role.codepipeline_role.id
policy = <<EOF
{
"Version": "2012-10-17",
"Statement": [
{
"Effect":"Allow",
"Action": [
"s3:GetObject",
"s3:GetObjectVersion",
"s3:GetBucketVersioning",
"s3:PutObjectAcl",
"s3:PutObject",
"iam:GetRole",
"iam:PassRole"
],
"Resource": [
"${aws_s3_bucket.codepipeline_bucket.arn}",
"${aws_s3_bucket.codepipeline_bucket.arn}/*",
"*"
]
},
{
"Effect": "Allow",
"Action": [
"codestar-connections:UseConnection"
],
"Resource": "${aws_codestarconnections_connection.example.arn}"
},
{
"Effect": "Allow",
"Action": [
"codebuild:BatchGetBuilds",
"codebuild:StartBuild"
],
"Resource": "*"
},
{
"Effect": "Allow",
"Action": [
"cloudformation:DescribeStacks",
"kms:GenerateDataKey",
"iam:GetRole",
"iam:PassRole"
],
"Resource": "*"
}
]
}
EOF
}
resource "aws_codebuild_project" "flask_app" {
name = "flask-app-demo"
description = "Builds a flask application"
service_role = aws_iam_role.codebuild_role.arn
build_timeout = "5"
artifacts {
type = "CODEPIPELINE"
}
environment {
compute_type = "BUILD_GENERAL1_SMALL"
image = "aws/codebuild/standard:2.0"
type = "LINUX_CONTAINER"
privileged_mode = true
environment_variable {
name = "AWS_ACCOUNT_ID"
value = var.aws_account_id
}
environment_variable {
name = "AWS_DEFAULT_REGION"
value = var.aws_region
}
environment_variable {
name = "IMAGE_REPO_NAME"
value = var.image_repo_name
}
environment_variable {
name = "IMAGE_TAG"
value = var.image_tag
}
environment_variable {
name = "ECS_CLUSTER_NAME"
value = aws_ecs_cluster.flask_app_demo.name
}
environment_variable {
name = "ECS_SERVICE_NAME"
value = aws_ecs_service.flask_app_demo.name
}
environment_variable {
name = "ECS_TASK_DEFINITION"
value = aws_ecs_task_definition.flask_app_demo.family
}
}
source {
type = "CODEPIPELINE"
buildspec = "buildspec.yml"
}
}
resource "aws_iam_role" "codebuild_role" {
name = "flask_demo_codebuild_role"
assume_role_policy = <<EOF
{
"Version": "2012-10-17",
"Statement": [
{
"Action": "sts:AssumeRole",
"Principal": {
"Service": "codebuild.amazonaws.com"
},
"Effect": "Allow",
"Sid": "TrustPolicyStatementThatAllowsEC2ServiceToAssumeTheAttachedRole"
}
]
}
EOF
}
resource "aws_iam_role_policy" "codebuild_policy" {
name = "flask_demo_codebuild_policy"
role = aws_iam_role.codebuild_role.id
policy = <<EOF
{
"Version": "2012-10-17",
"Statement": [
{
"Action": [
"logs:CreateLogGroup",
"logs:CreateLogStream",
"logs:PutLogEvents"
],
"Resource": "arn:aws:logs:*:*:*",
"Effect": "Allow"
},
{
"Action": [
"s3:GetObject",
"s3:GetObjectVersion",
"s3:GetBucketVersioning"
],
"Resource": [
"arn:aws:s3:::${aws_s3_bucket.codepipeline_bucket.bucket}",
"arn:aws:s3:::${aws_s3_bucket.codepipeline_bucket.bucket}/*"
],
"Effect": "Allow"
},
{
"Action": [
"ecr:BatchCheckLayerAvailability",
"ecr:CompleteLayerUpload",
"ecr:GetAuthorizationToken",
"ecr:InitiateLayerUpload",
"ecr:PutImage",
"ecr:UploadLayerPart"
],
"Resource": [
"*"
],
"Effect": "Allow"
},
{
"Action": [
"ecs:UpdateService",
"iam:GetRole",
"iam:PassRole"
],
"Resource": [
"*"
],
"Effect": "Allow"
}
]
}
EOF
}
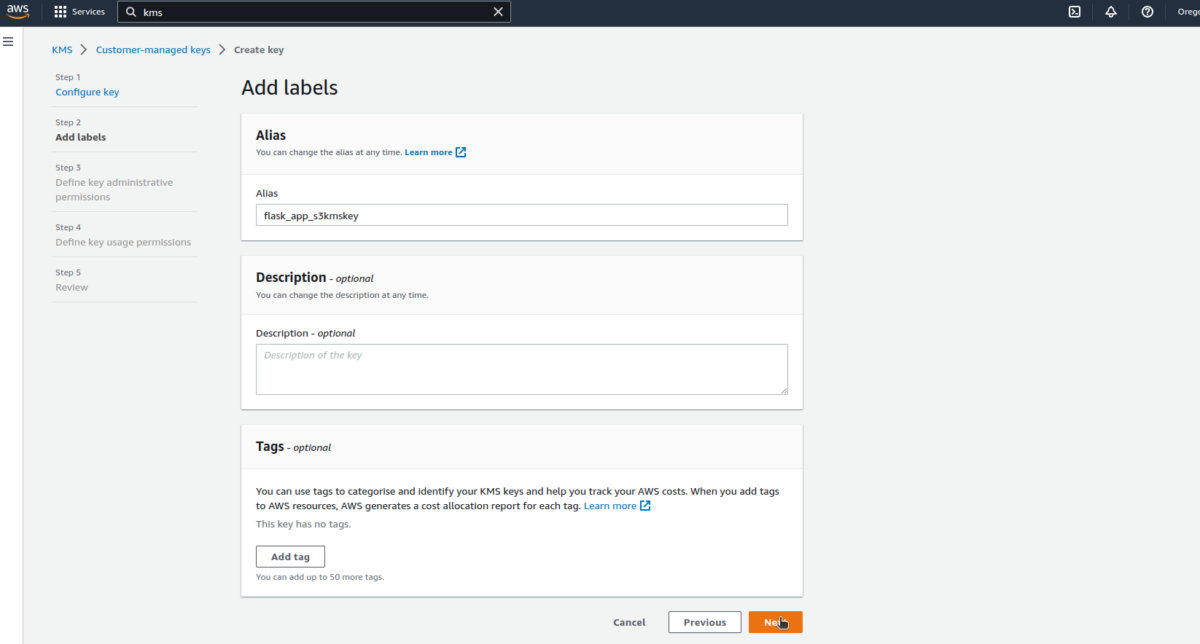
data "aws_kms_alias" "s3kmskey" {
name = "alias/flask_app_s3kmskey"
}This seems like a big one 😮. Let’s break it down.
Quick detour: if we check line 8, we will see that we are referencing an encryption key from the data in line 248. This is a dependency we need to check off our list because we use it to encrypt the github action artifacts stored in our S3 buckets. Find out more about KMS here.
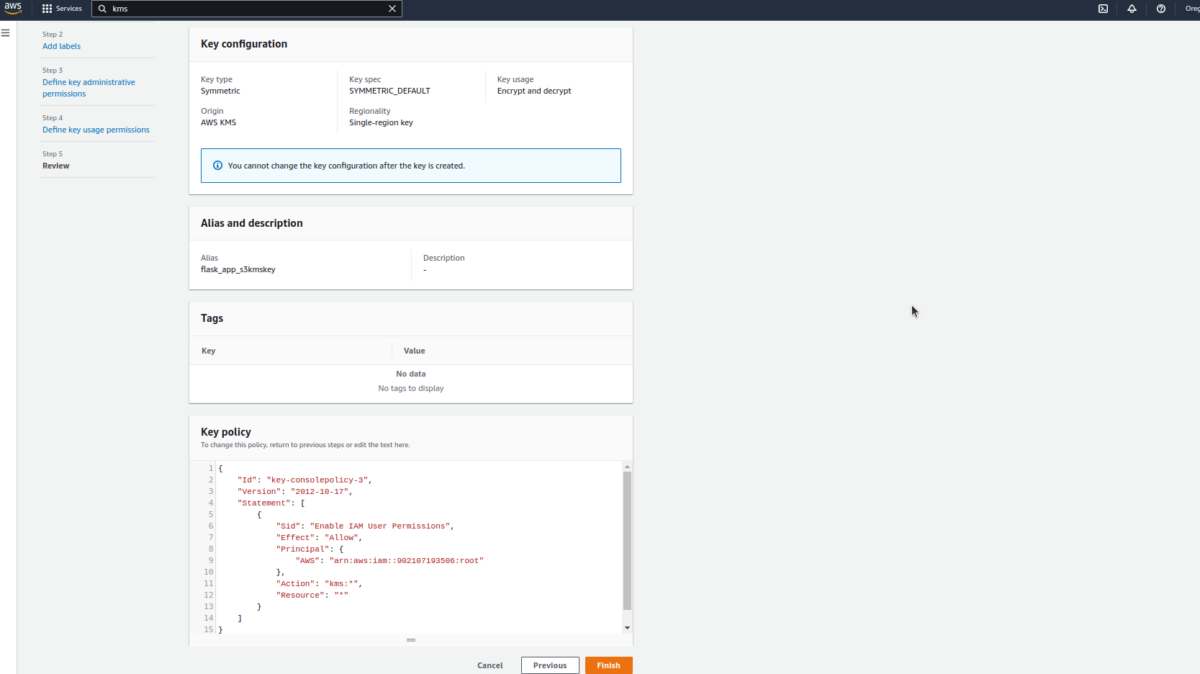
The steps below can be used to create a KMS key.

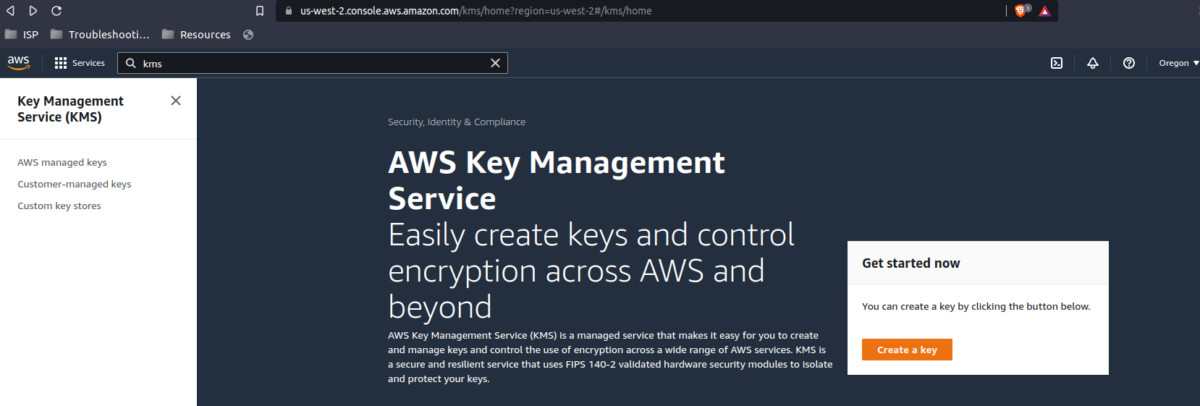
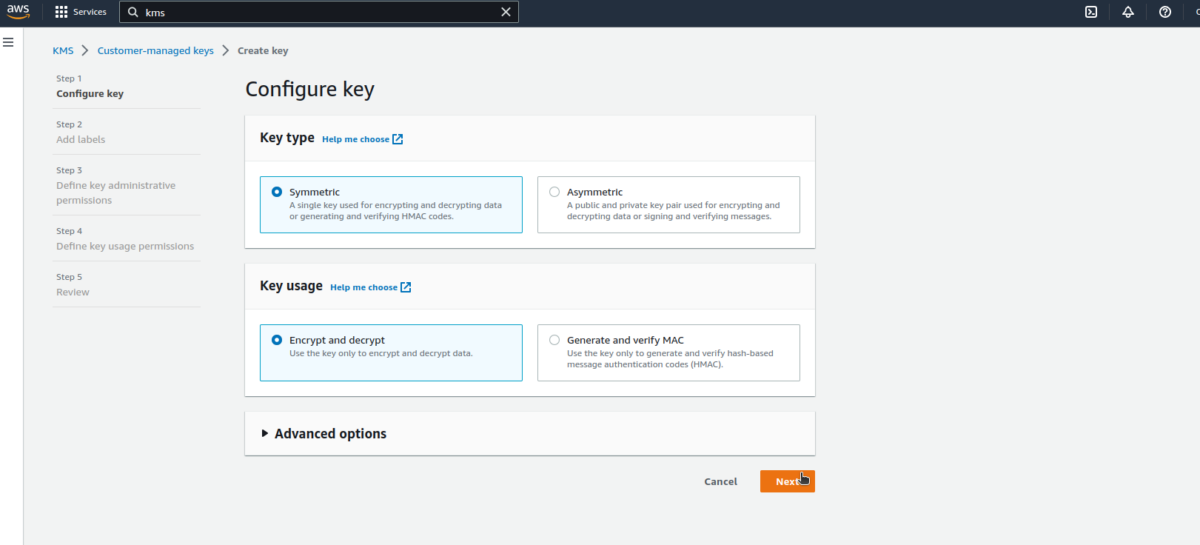
In the next steps, there is no need to select specific roles at this stage; we’ll do that later.
Okay, now that that’s out of the way, we can explain how our code works.
In L1 to L43, we create our codepipeline resource; every other resource here is attached to this resource in different stages.
The Terraform resource can be found here.
The artifactStore field contains the artifact bucket type and location for a pipeline with all actions in the same AWS Region. If you add actions in a Region different from your pipeline, the artifactStores mapping is used to list the artifact bucket for each AWS Region where actions are executed. When you create or edit a pipeline, you must have an artifact bucket in the pipeline Region, and then you must have one artifact bucket per Region where you plan to execute an action.
We can see from in L12 - L41 that we have two stages in our code pipeline. Conventionally, this is usually 3 stages (Source, Build, Deploy), but we have handled deployments in our buildspec and there is no need to overcomplicate this process. There are use cases where the deploy phase is quite important too. You can check out the link in the CodePipeline explanation at the beginning of this article.
This is also the reason why the deploy stage is greyed out in our Terraform architecture diagram.
In the source stage, we simply connect our pipeline to our GitHub repository using CodeStarSourceConnection. CodeStarSourceConnection is used when we want to use code from Bitbucket, GitHub, GitHub Enterprise Server. Other valid providers are S3, ECR, CodeCommit. You can find more on the pipeline structure here.
In the build stage, we use CodeBuild to build (and deploy, in our case) our app based on the aws_codebuild_project resource configuration in L126. There are other alternative providers e.g. Custom Jenkins.
If you look closely, you’ll see that the output artifact in our source stage is the input artifact in our build stage.
In L126 - L172, we create our CodeBuild resource.
Here, we are asking CodeBuild to use a Linux container, pass the declared environmental variables to our build process, and use the buildspec file in the source block.
In L55 - L125, we create roles and policies for CodePipeline.
This is important for our S3, CodeStar, CodeBuild, KMS and also IAM activities like role assumption.
In L173 - L247, we create roles and policies for CodeBuild.
This is also important for logging and interacting with ECR, ECS, S3, and IAM.
Well, that’s it. Let’s proceed to apply our configuration.
At this point, our directory tree looks like this:
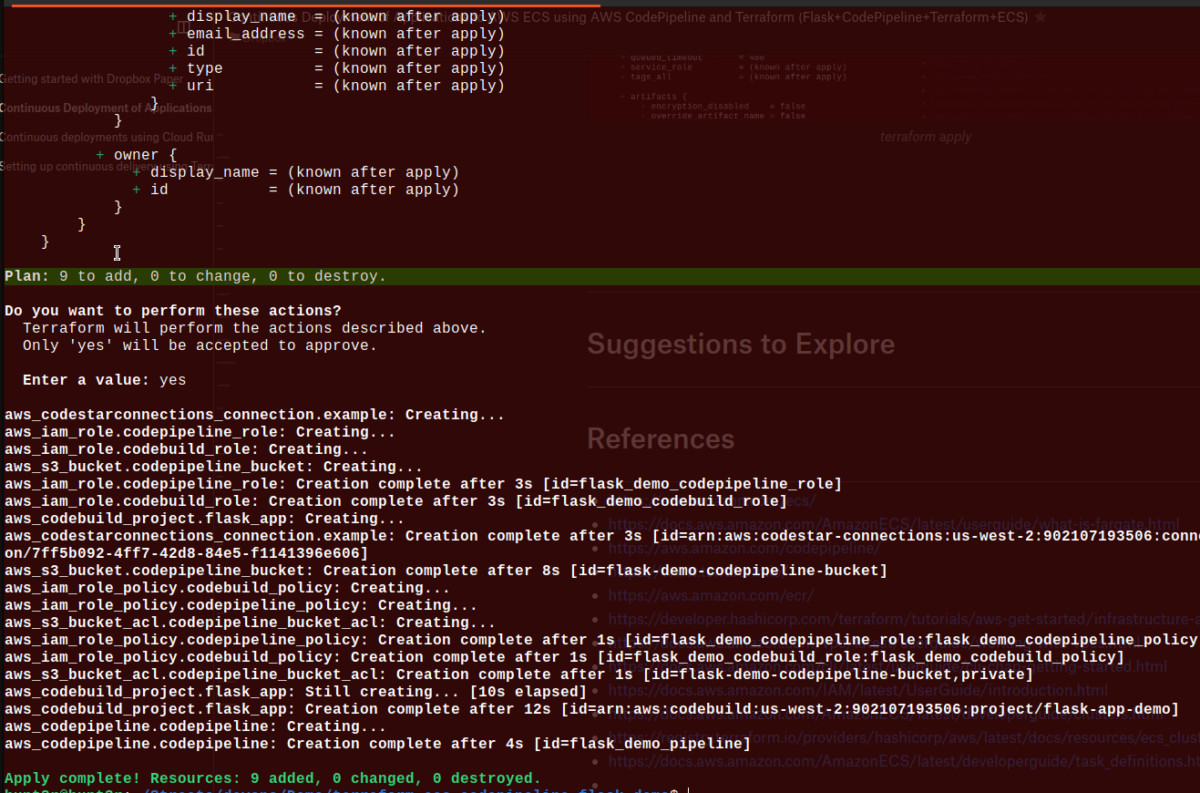
Apply Configuration
$ terraform apply
Verify Implementation
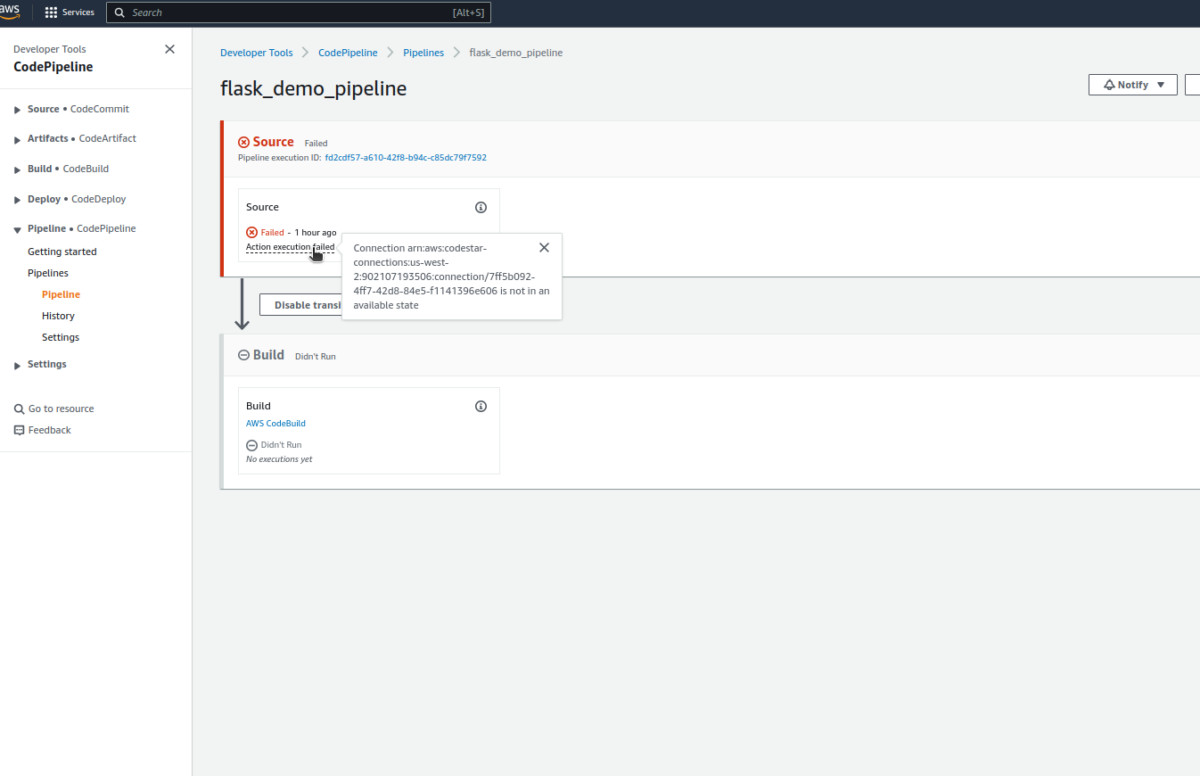
- Check CodePipeline
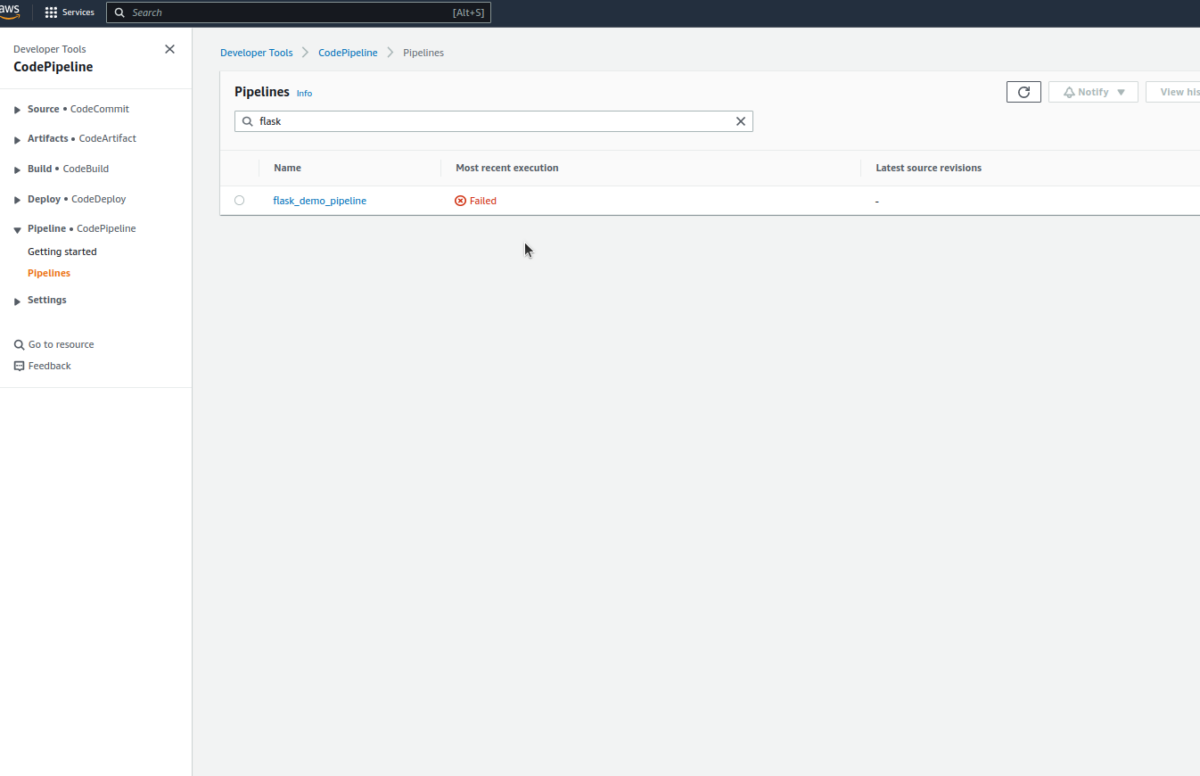
It’s normal for the first execution to fail; this is because we need to authorize the GitHub connection created. When you open the pipeline, you’ll see an error like this in the source stage.
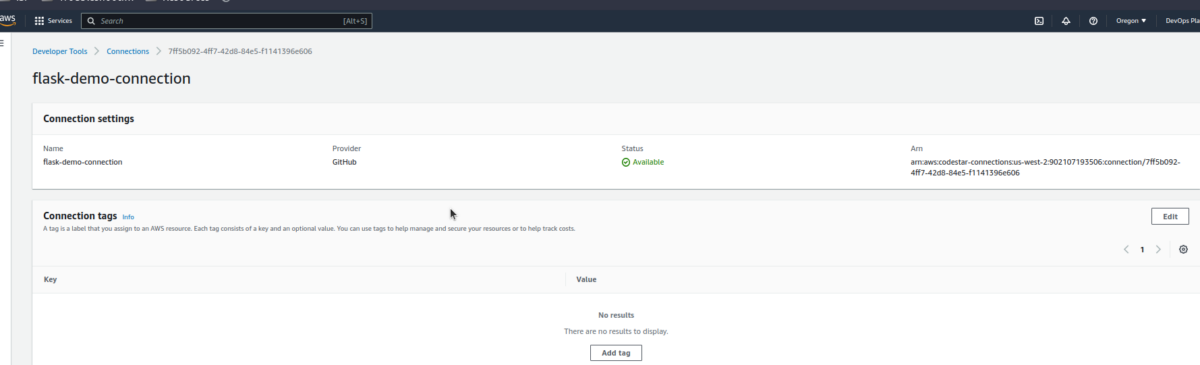
- Authorize the GitHub connection
Navigate to Settings>Connections on the sidebar.
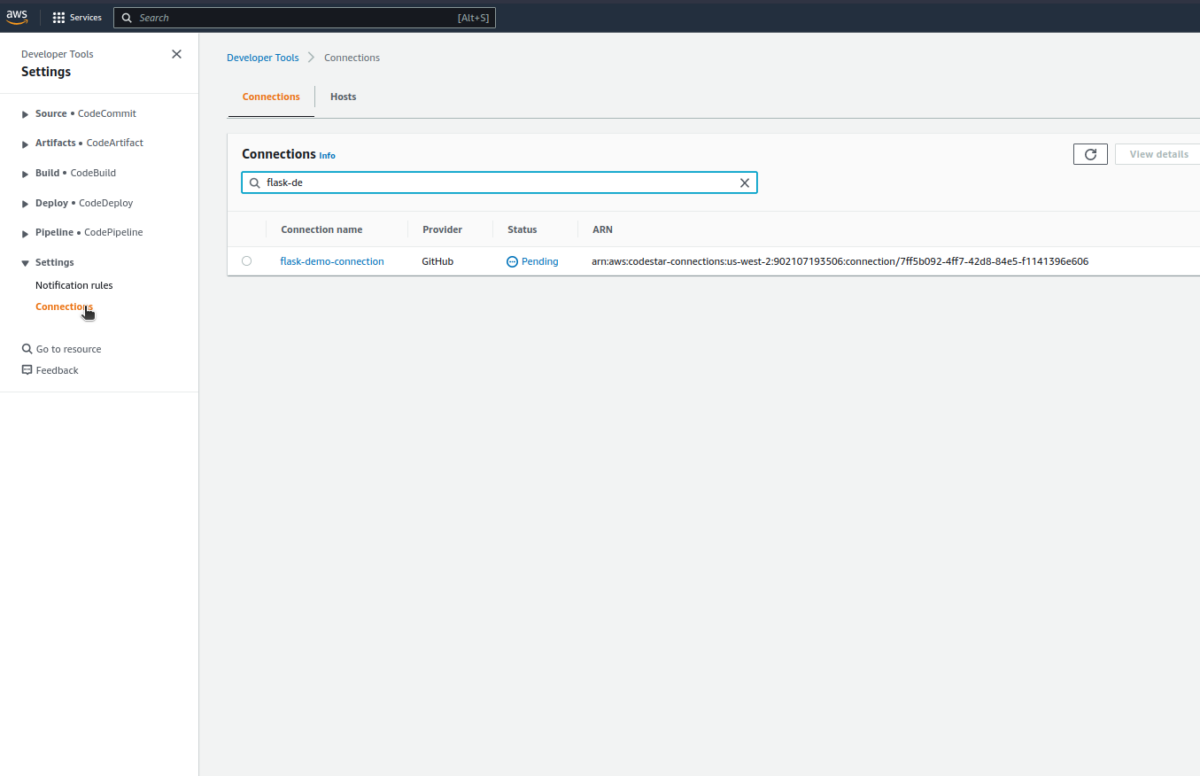
Update the connection, and we should be good to go.
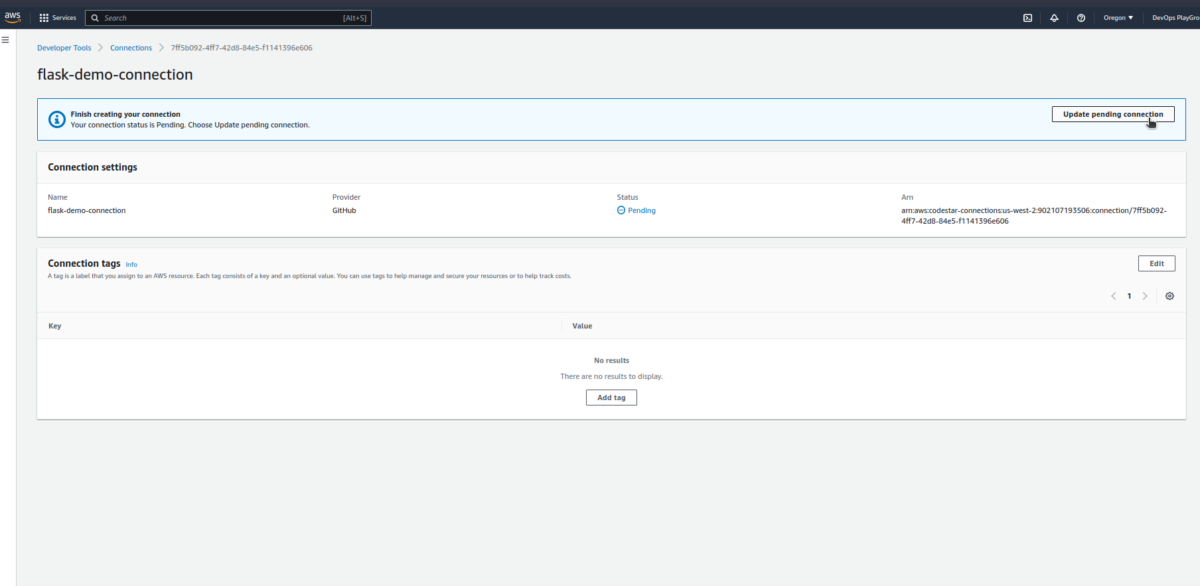
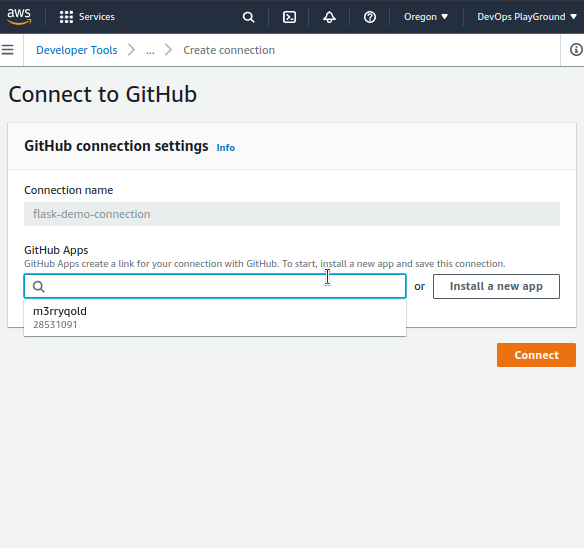
I’ve previously connected to Github, so I have my account here. You can install a new app if you’ve not done this before. If you have a previous connection, you need to ensure your new repo is included in this connection access.
At this point, our connection status changes to Available.
- Push local code to GitHub
We can push our code to GitHub and observe our pipeline stages.
$ git status
$ git add .
$ git commit -m "full setup"
$ git push origin main
We can trigger our pipeline at this point; we would get an error like the one below:
[GitHub] Upload to S3 failed with the following error: The ciphertext refers to a customer master key that does not exist, does not exist in this region, or you are not allowed to access.This simply means our KMS key isn’t linked to our CodePipeline and CodeBuild roles. We can do that now.
- Open the flask_app_s3kmskey
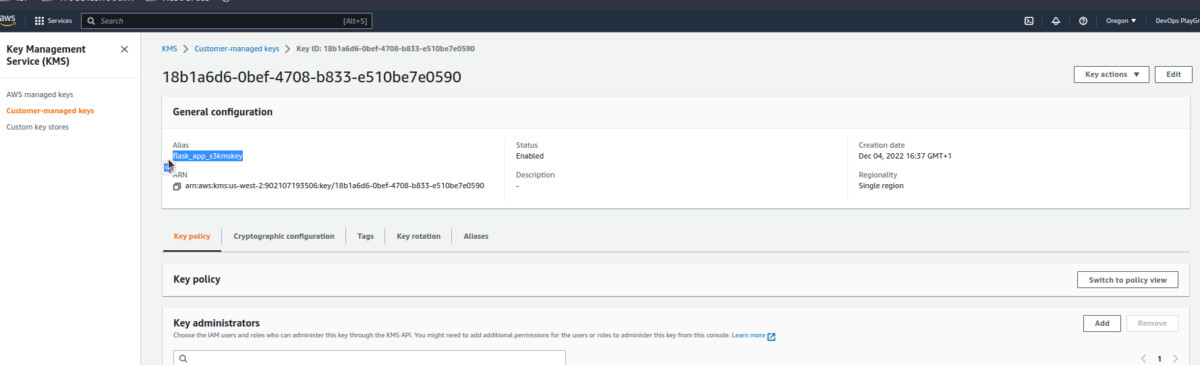
- Scroll down and add our codebuild and codepipeline roles to the key users.
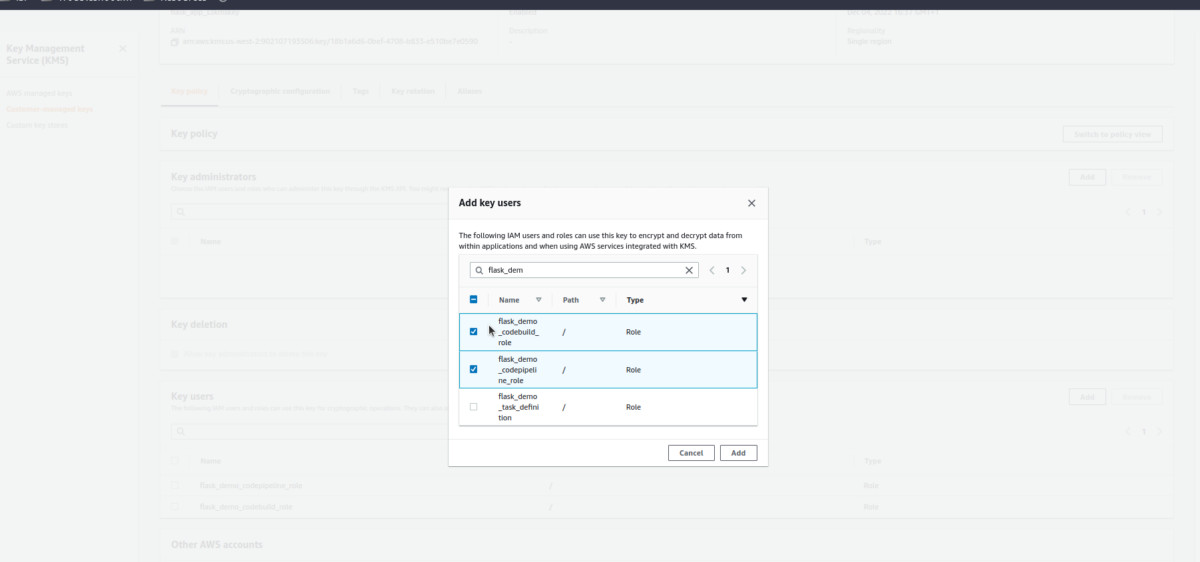
- Re-run the Pipeline.
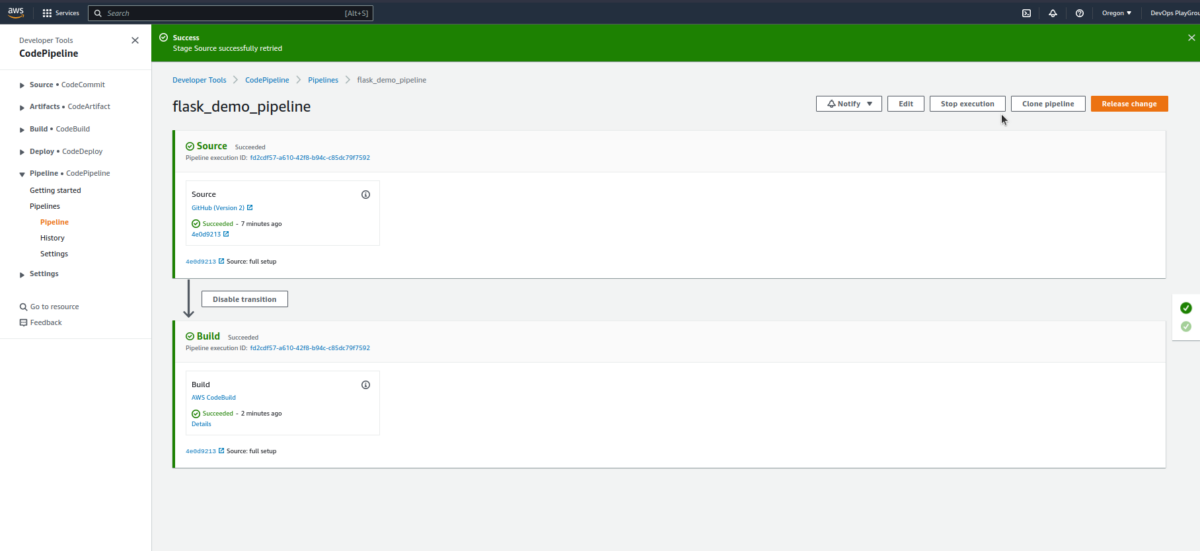
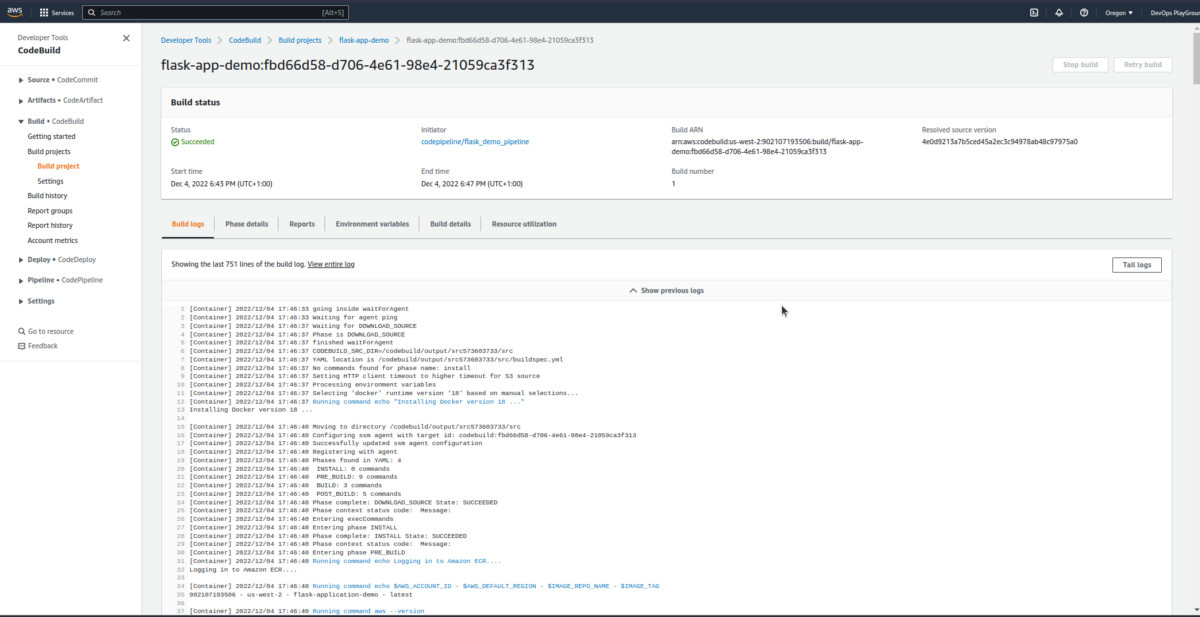
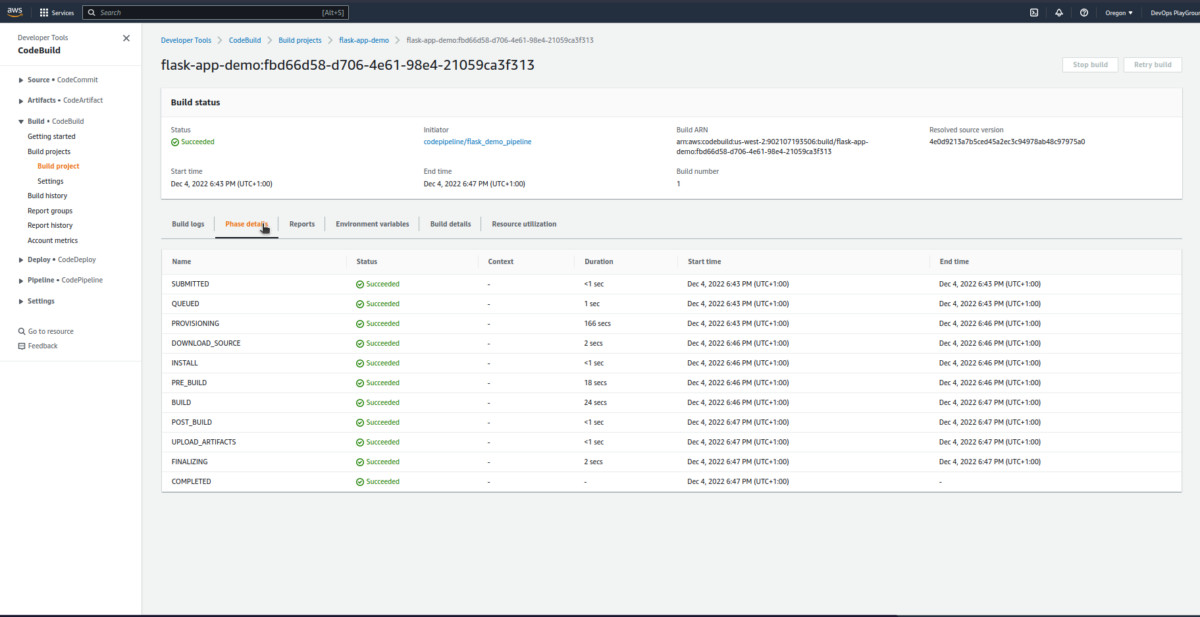
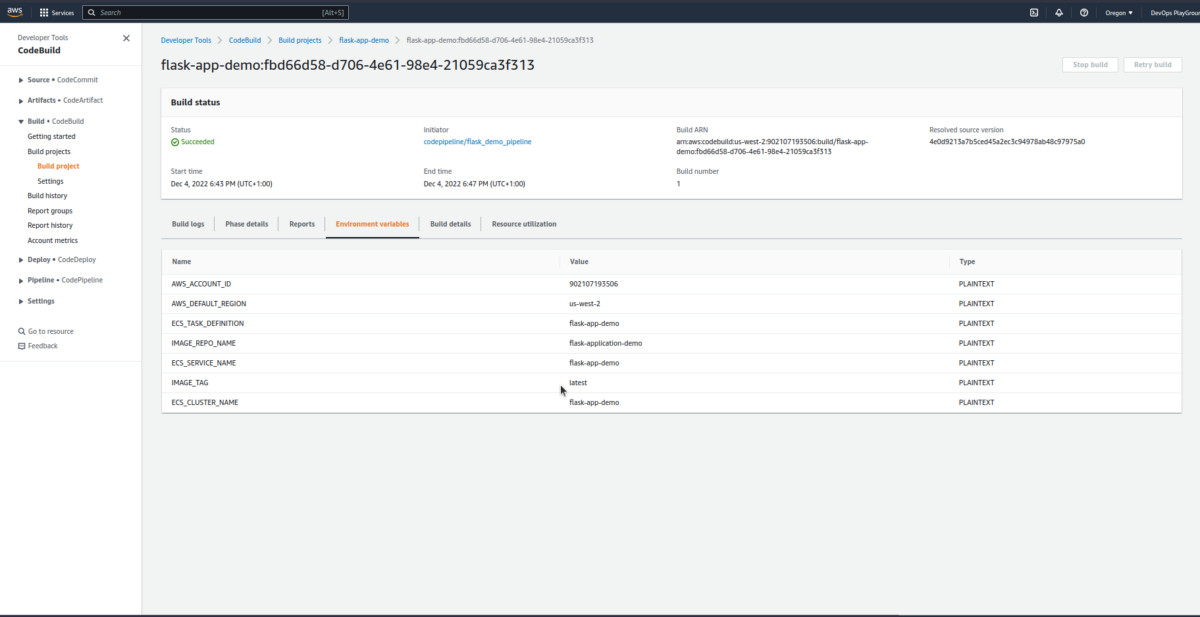
- Click
AWS CodeBuildand view more information about the build process.

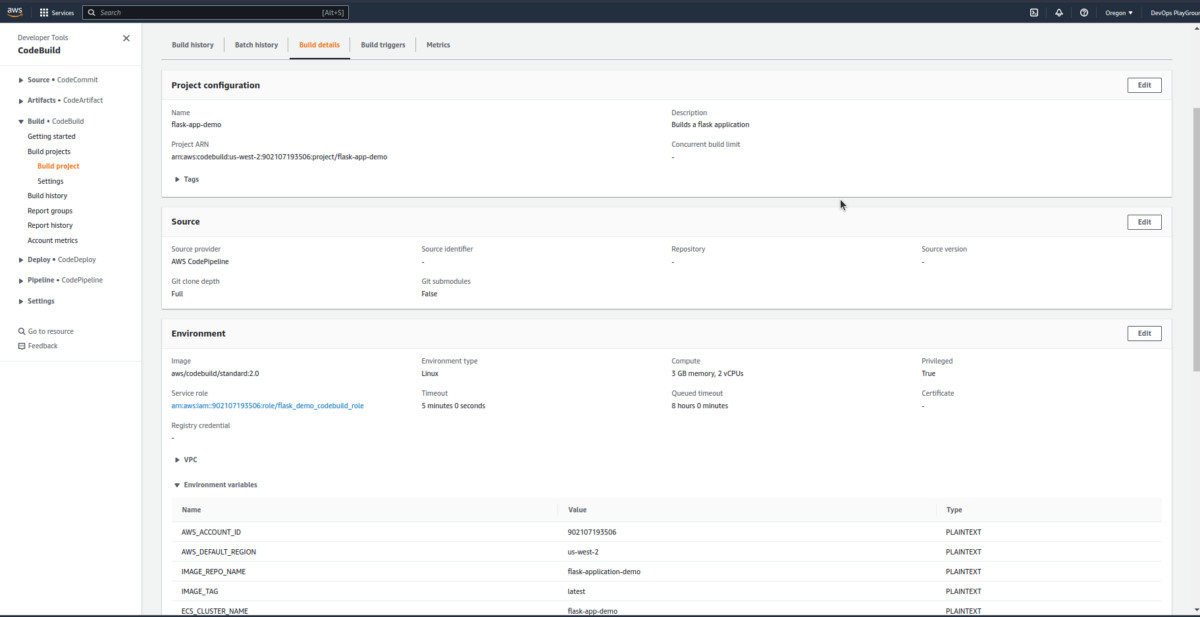
- Click the latest
build runin the build history to view more info about the current build.
You can explore this more.
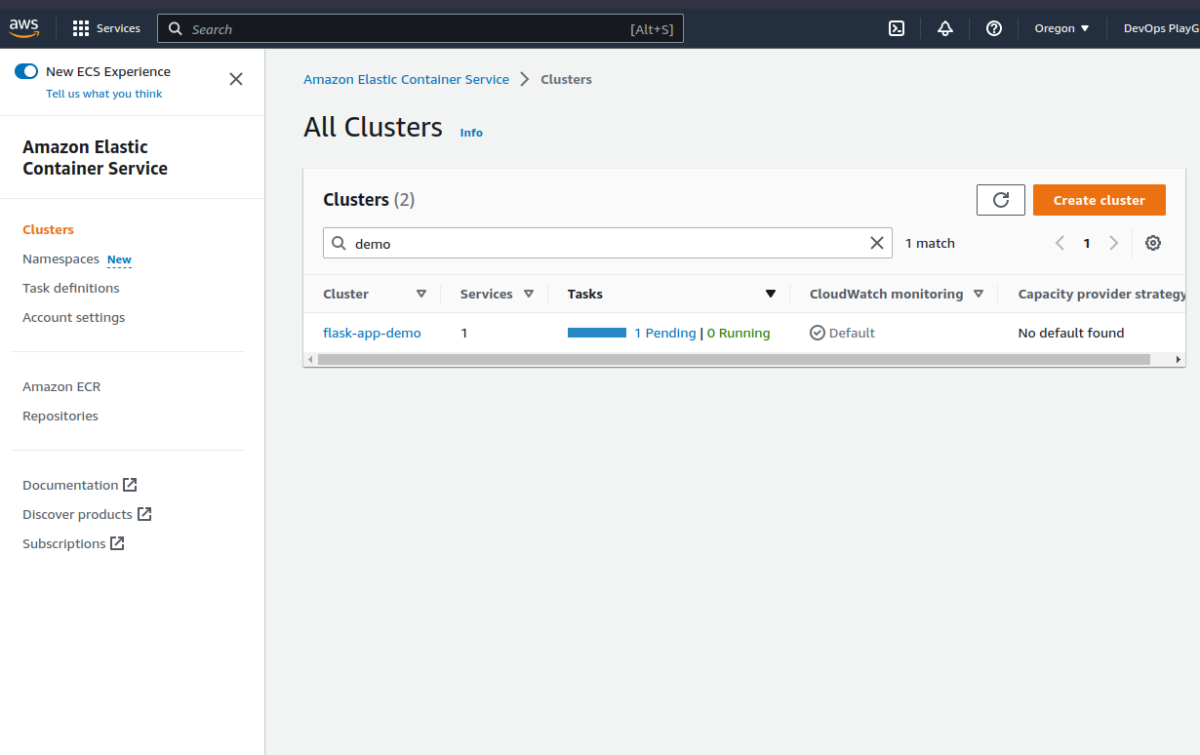
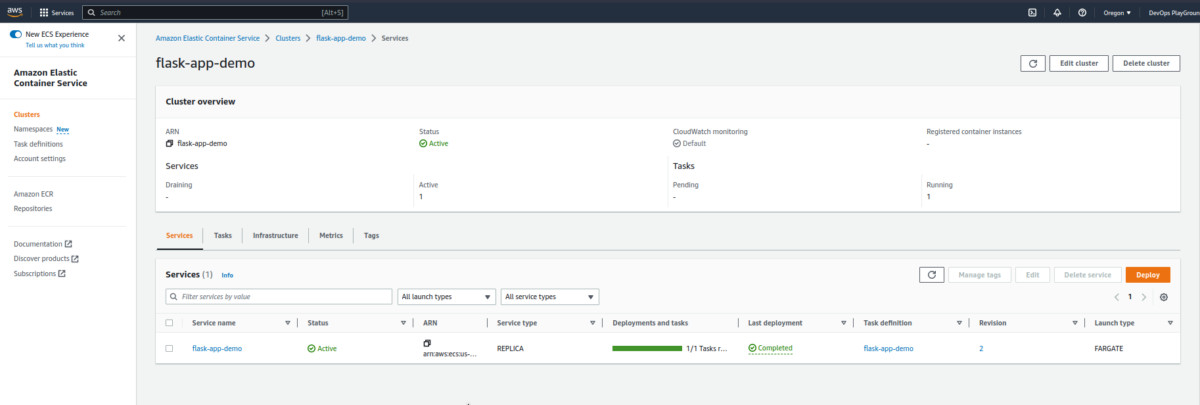
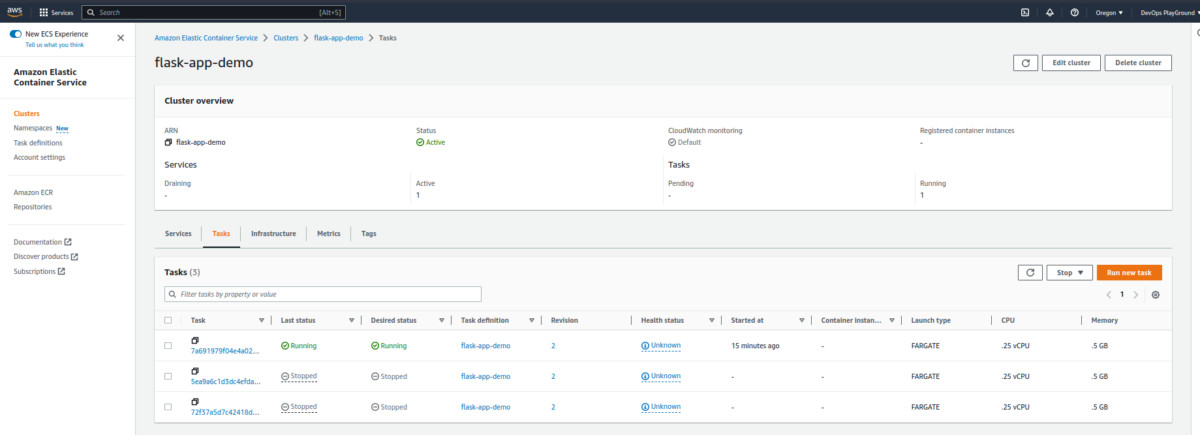
ECS Verification
- Check the ECS cluster.

- Check the cluster information.
Navigate to Clusters > Services > flask-app-demo > Networking.
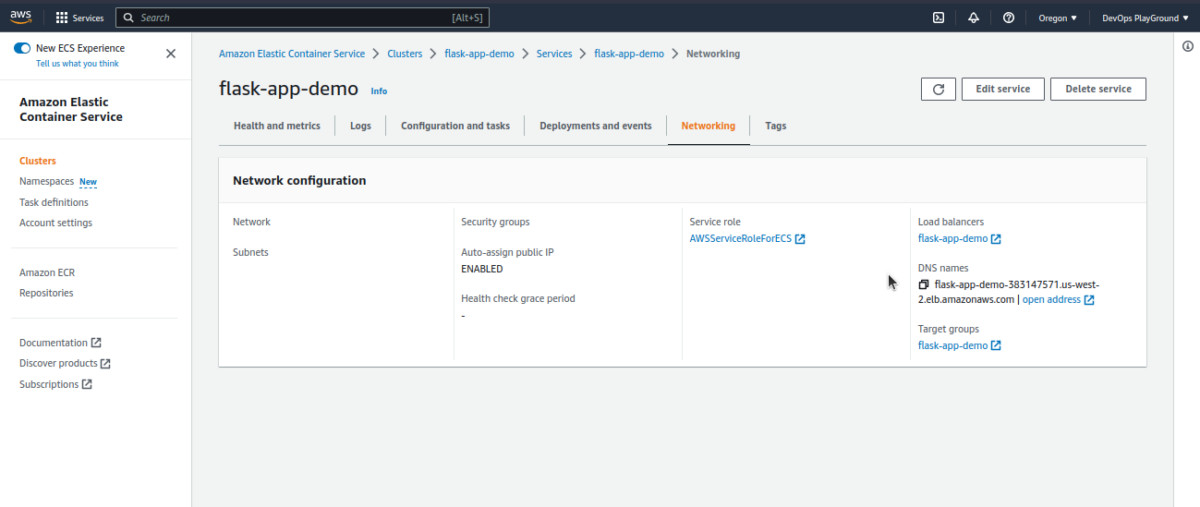
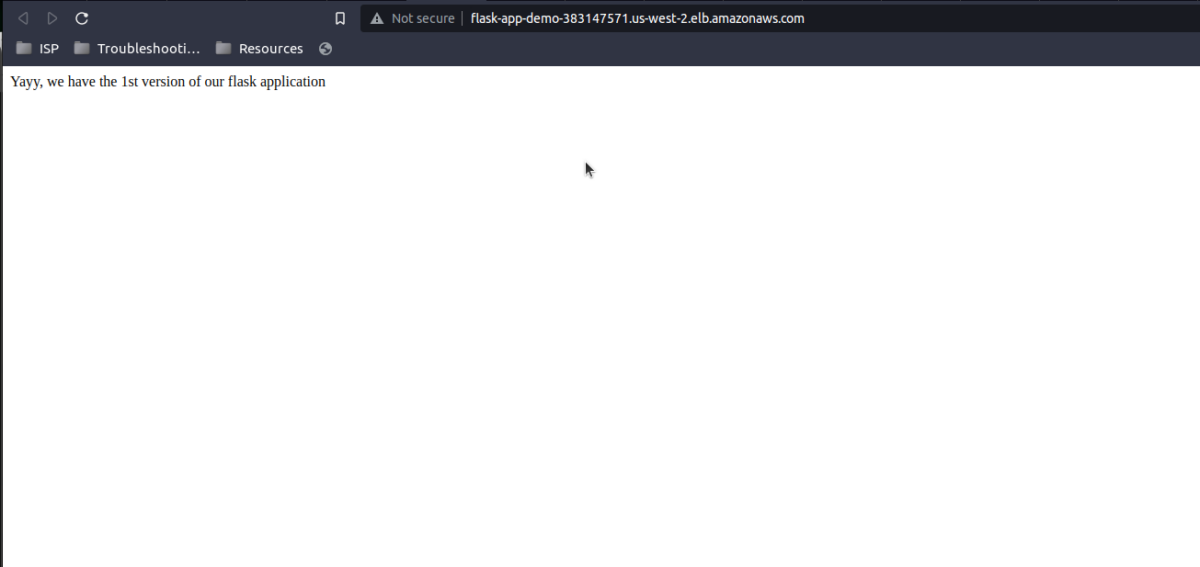
Here we see our load balancer URL. If we click it, it should take us to the deployed version of our app.
Continuous deployment verification
- Update flask application
flask_app/app.py
from flask import Flask
app = Flask(__name__)
@app.route("/")
def hello():
    return "Yayy, we have the 2nd version of our flask application"
if __name__ == "__main__":
app.run(host="0.0.0.0")- Push to GitHub
$ git status
$ git add .
$ git commit -m "update flask app"
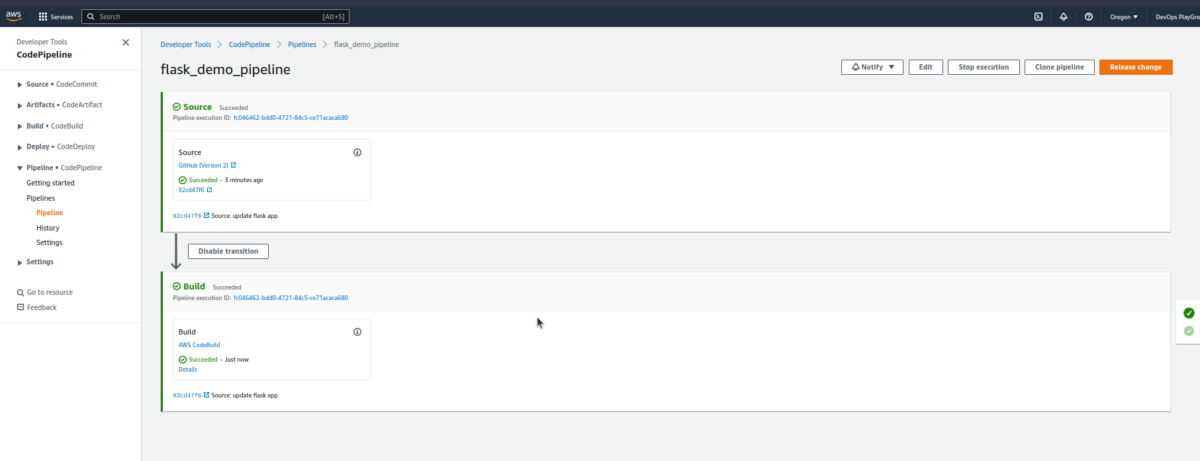
$ git push origin main - Check our pipeline
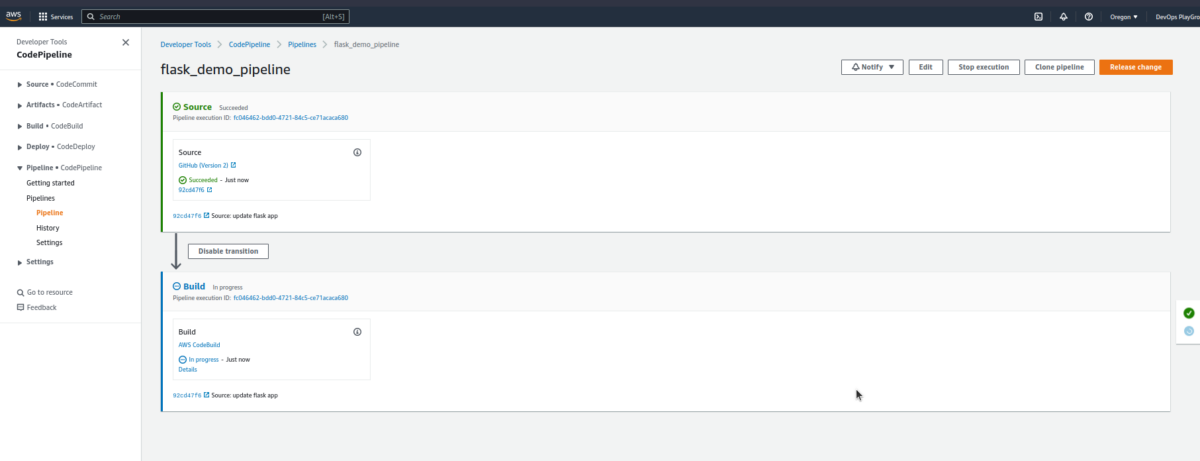
- After the build is completed, confirm our change reflects on the app.
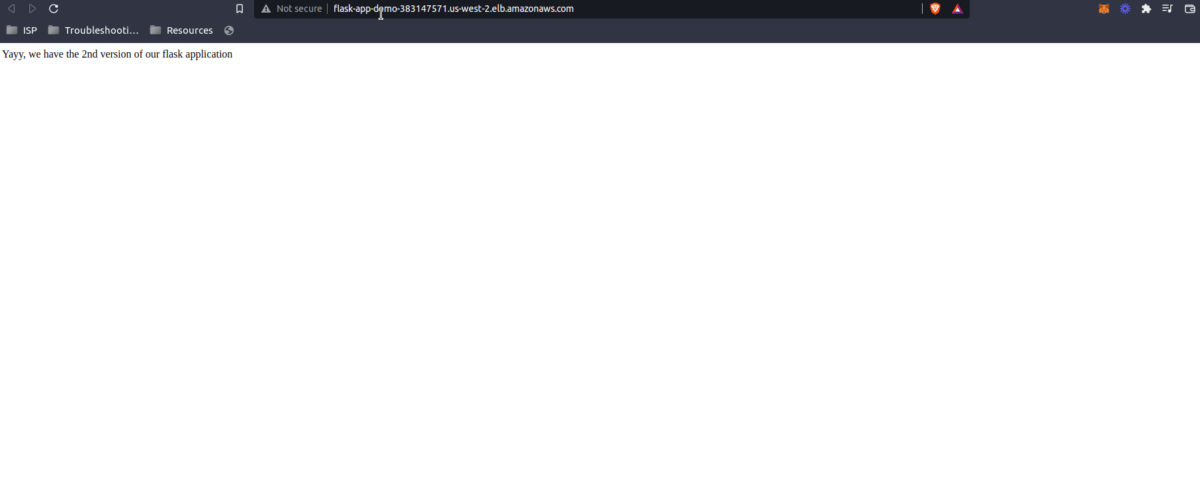
Yay, we’re good to go, and now you know how to deploy AWS ECS using AWS CodePipeline and Terraform.
In this AWS CodePipeline Terraform tutorial, we were able to:
- Fully set up a Fargate ECS cluster using Terraform.
- Create and dockerize a basic Flask application.
- Set up a CodePipeline to automatically deploy our Flask application to ECS from GitHub
Suggestions to Explore
- Automate configuration done by terraform gitlab with GitHub actions or GitLabCI
- Explore other use cases of CodePipeline AWS, e.g., what do you do when you need approvals before deploying but after building?
- Try using CodePipeline to deploy to another AWS service, e.g., Amazon EBS.
