Although I’ve worked as a full-stack developer for many years, I like to define myself as a back-end developer. This is because I lack the creativity crucial for building high-quality front-ends, and all I know about front-end frameworks is limited within the boundaries of Vue.js. I surely can whip up a fairly complex application using vanilla JavaScript, but Vue.js is where I feel at home.
This feeling played a massive part in my picking Laravel over other frameworks. Laravel has always had great support for Vue js developers, and according to Vue.js: The Documentary, Taylor Otwell is one of the first famous people in the developer community to endorse Vue.js publicly.
Vue.js has evolved drastically since its early days, and in this article, I’ll discuss Laravel with the Vue JS 3 tutorial. So, without further ado, let's jump in.
Table of contents
Bootstrapping a New Project and Installing the Dependencies
The first step is, of course, to have a project. If you have one on your computer, use that, or you can create a new one for this article only.
composer create-project laravel/laravel guide-to-laravel-and-vueAfter the project has been bootstrapped, you’ll have to install the npm dependencies. To do so, execute the following command inside your project directory:
npm installOnce the dependencies finish installing, execute the following command to compile the assets and make sure everything’s working indeed:
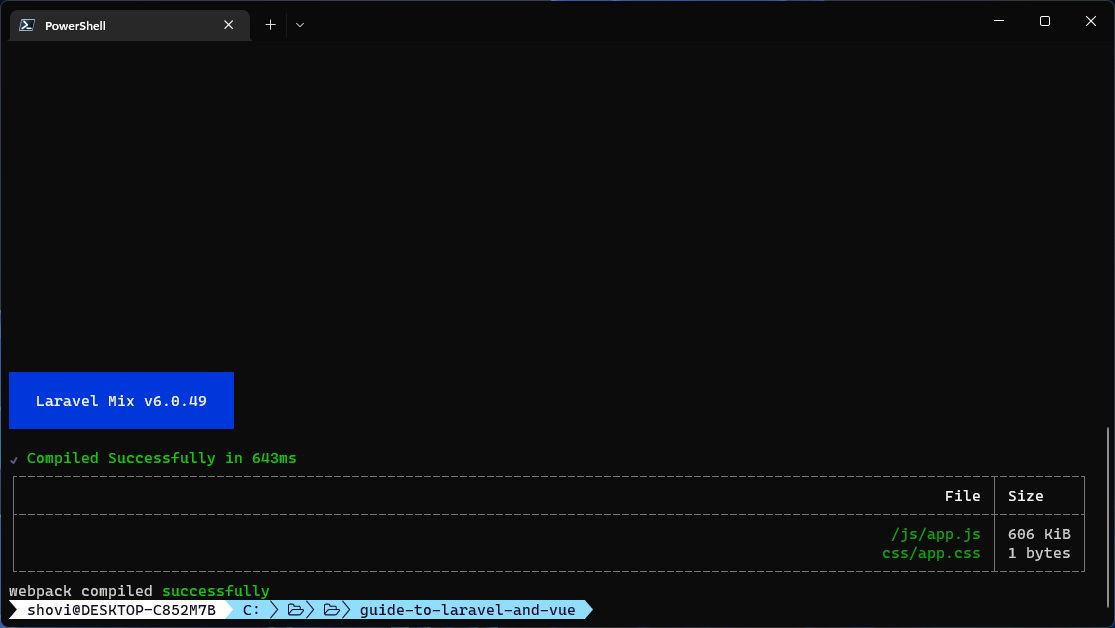
npm run devIf everything works out fine, you’ll see something as follows:

When you executed the npm run dev command, Laravel Mix compiled the resources/js/app.js file and the resources/css/app.css file into public/js/app.js and public/css/app.css files.
Installing Vue.js and Writing Your First Component
Since you have your project set up, it’s time to install Vue.js 3, and provide yourself with the Vue simple progress with Laravel. To do so, execute the following command on your project directory:
npm install --save-dev vueThis will install Vue.js as one of the development dependencies. After compiling the assets, the production JavaScript file will be self-sufficient, so installing Vue.js as a development dependency is enough.
To make sure that Vue 3 has been installed properly, open the package.json file and look for "vue" under the "devDependencies" section:
// package.json

{
    "private": true,
    "scripts": {
        "dev": "npm run development",
        "development": "mix",
        "watch": "mix watch",
        "watch-poll": "mix watch -- --watch-options-poll=1000",
        "hot": "mix watch --hot",
        "prod": "npm run production",
        "production": "mix --production"
    },
    "devDependencies": {
        "axios": "^0.21",
        "laravel-mix": "^6.0.6",
        "lodash": "^4.17.19",
        "postcss": "^8.1.14",
        "vue": "^3.2.37"
    }
}
As you can see, the version number indicates that Vue.js 3 has been installed. You’ll first have to create an app instance to create a new component. Open up resources/app.js and update its content as follows:
// resources/app.js

require('./bootstrap');

import { createApp } from 'vue';
import HelloVue from './components/HelloVue.vue';

createApp({
    components: {
        HelloVue,
    }
}).mount('#app');
We haven’t talked about that HelloVue.vue file yet. In this file, you’re creating a new Vue.js instance. Back in the days of Vue.js 2, this used to be different, but this is the Laravel with Vue js 3 way. If you’d like to learn more, consult the official docs.
Create a new file resources/components/HelloVue.vue and put the following code in it:
// resources/components/HelloVue.vue

<template>
  <h1>Hello Vue!</h1>
</template>

<script>
export default {
    name: 'HelloVue'
}
</script>
This is a basic Vue.js component that prints out Hello Vue! on the page. Finally, open the webpack.mix.js file on the project root and update its content as follows:
// webpack.mix.js

const mix = require('laravel-mix');

mix.js('resources/js/app.js', 'public/js')
    .vue({
        version: 3,
    })
    .postCss('resources/css/app.css', 'public/css', [
        //
    ]);
This .vue() call will compile any Vue.js code and bundle that with the production JavaScript file. The function takes an object where you can define the version of Vue.js you’re using. Although it can detect the version automatically, I like being explicit.
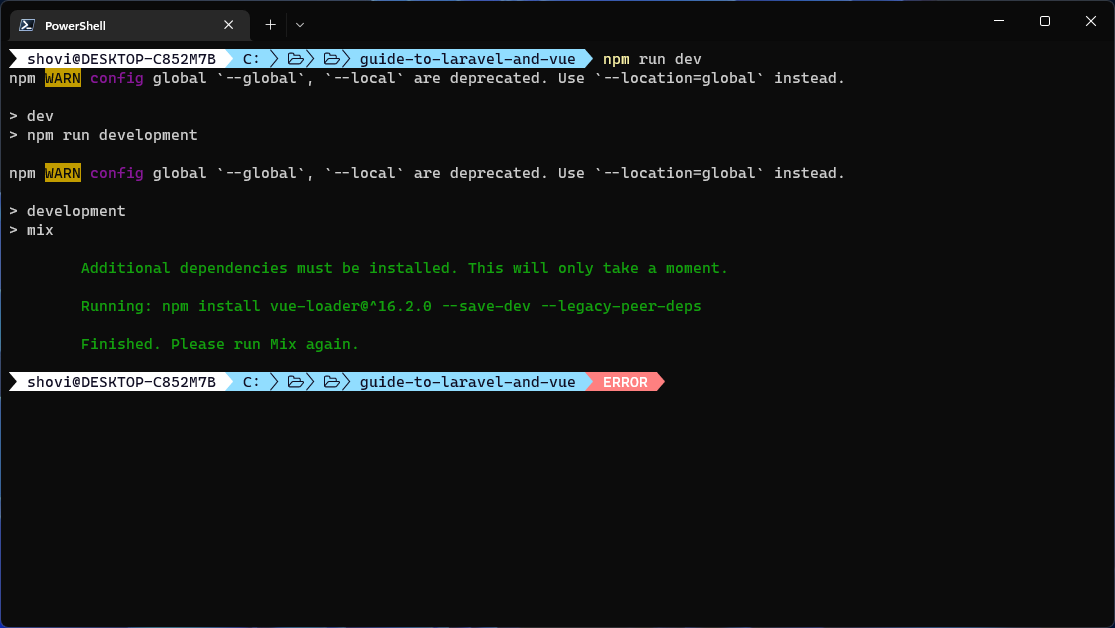
Now you’ll have to compile the JavaScript code. To do so, execute the npm run dev command once again. However, instead of a successful compilation message, you’ll get something as follows:

This is completely okay. Laravel Mix requires the package to perform the compilation, and it’s intelligent enough to istall it automatically. Run the npm run dev command. This time, you may get one of two possible outcomes.
Either the command will succeed and compile your code into a bundle, or it’ll fail with Error: Cannot find module 'webpack/lib/rules/DescriptionDataMatcherRulePlugin' error. If this happens, try executing npm install --``save-dev vue-loader and recompile the code.
Finally, open resources/views/welcome.blade.php and put the following code in it:
<!DOCTYPE html>
<html lang="en">
<head>
    <meta charset="UTF-8">
    <meta name="viewport" content="width=device-width, initial-scale=1.0">
    <meta http-equiv="X-UA-Compatible" content="ie=edge">
    <title>Laravel Vue</title>
    <script src="{{ asset('js/app.js') }}" defer></script>
</head>
<body>
    <div id="app">
        <hello-vue />
    </div>
</body>
</html>
If you remember from the code in the // resources/app.js file, the Vue.js instance will be mounted on an HTML element with app ID. Inside that element, you can put any of your custom Vue.js components as you like.
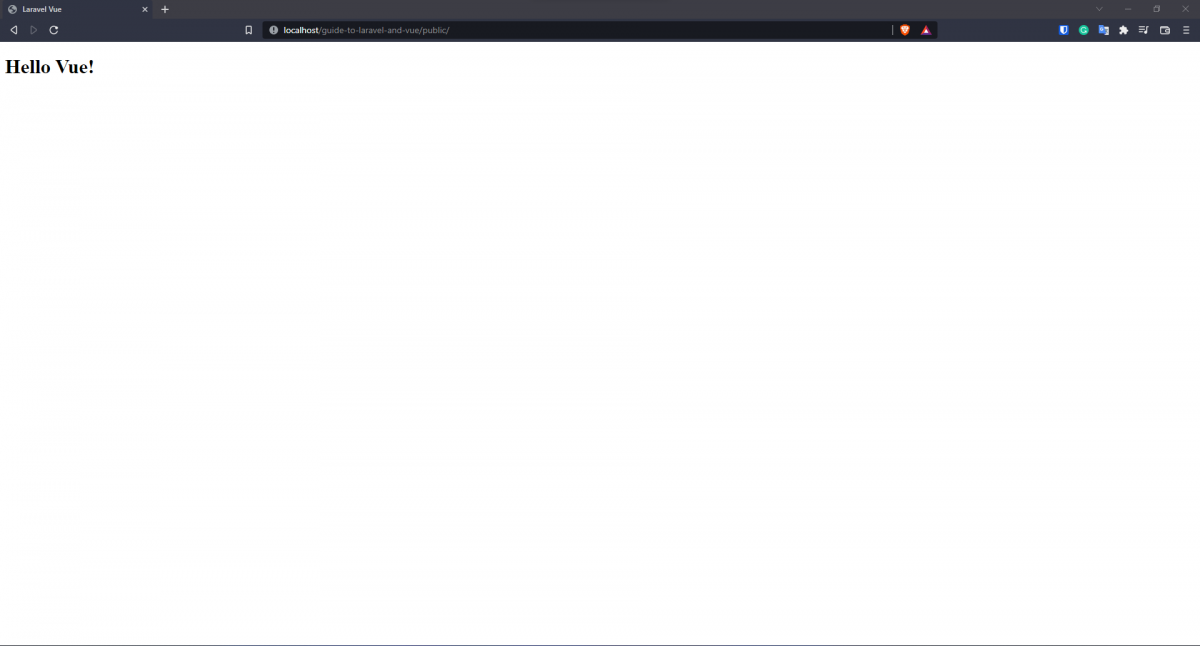
Run your application using php artisan serve and open it in your favorite browser:

There you go. Vue.js is up and running on your Blade template. There are other concepts, such as making requests to the back-end, Laravel passport API authentication, and so on, but since these things can be done in many different ways, I would leave it to the developer’s preference.
Conclusion
I would like to thank you for the time you've spent reading this article. I hope you've enjoyed it and learned some valuable things about using Vue with Laravel. I would suggest you read through the official Laravel docs on Compiling Assets (Mix) to learn about concepts such as cache busting, environment variables, vendor extraction, and more. Nevertheless, you know how to run a Laravel application with Vue on a site.
If you have any questions, feel free to reach out to me. I'm available on Twitter and LinkedIn and always happy to help. And if you are interested in expanding your knowledge, you can also learn about React vs Vue.
Till the next one, stay safe and keep on learning.


