
AWS Lambda is a serverless computing platform that lets you run code without provisioning or managing servers. The platform invokes your code in response to events such as HTTP requests. Currently, there's no official support for Rust programming language on Lambda.
To run Rust code on Lambda, we will have to build a custom runtime that will run our code.
This guide will help you build for Lambda in a quick and simple way. It is targeted at developers who have a reasonable understanding of Rust and systems programming, and intend to build serverless function on AWS.
We will build a simple Rust application and deploy it to AWS Lambda. This guide will cover the following:
Requirements
- Rust toolchain.
- Docker.
- AWS Account & CLI.
Getting Started
We will need to install Rust and create a simple Rust project.
Installing Rust
To install Rust, we will use the rustup tool. rustup is a tool that manages our Rust toolchain in a consistent way on every platform Rust supports. It enables the installation of Rust from stable, beta, and nightly channels, as well as provide support to cross-compile programs to other targets.
curl --proto '=https' --tlsv1.2 -sSf https://sh.rustup.rs | shIf you have an existing rustup installation, run rustup update to update your installation.
Once the installation has completed, you will find the Rust toolchain installed in ~/.cargo/bin directory. The Rust toolchain includes:
rustc- Rust compiler.cargo- Rust package manager.cargo-clippy- Linter to catch common mistakes and improve your Rust code.rustdoc- Project documentation builder.rustfmt- Formats Rust code, making it easier to read, write, and maintain.
Check your cargo version by running:
cargo --version
#cargo 1.43.0 (3532cf738 2020-03-17)
During installation, rustup will attempt to include the directory in the system PATH environment variable. If the above command fails after successful installation, manually add the directory to system PATH by executing:
echo 'export PATH="$HOME/.cargo/bin:$PATH"' >> ~/.bashrcAdditional toolchains from other distribution channel will be stored in ~/.rustup/toolchains.
Creating the Rust Program
We will be using cargo to create a new project. The command cargo new by default starts a new package which we will use to make a binary program.
cargo new rust_lambdaThe above command will create a project directory (relative to the current directory) called rust_lambda and generate some necessary files.
Our project directory structure should look like:
rust_lambda/
├── Cargo.toml
└── src
    └── main.rs

1 directory, 2 files
Now let's change into our project directory and view the files. Run cd rust_lambda to enter the directory.
Cargo.toml
This file contains all the metadata that cargo needs to install and compile our package. This file is also called a manifest. By default, cargo new adds two sections to the manifest – [package] and [dependencies]. The package section defines the details about the package (our project).
The dependencies section defines our package dependencies. You can learn more about the manifest file format here.
[package]
name = "rust_lambda"
version = "0.1.0"
authors = ["Chuma Umenze <[email protected]>"]
edition = "2018"

# See more keys and their definitions at https://doc.rust-lang.org/cargo/reference/manifest.html
[dependencies]
We will need to include a few crates in the dependencies section of our manifest file. A crate is a compilation unit in Rust which can be compiled into a binary or library package. We will be using the following crates:
lambda_runtime– A Rust runtime for AWS Lambda.serde– Serialization and Deserialization framework for Rust.
Add them to your dependencies section. The section should look like this:
[dependencies]
lambda_runtime = "0.2.1"
serde = { version = "^1.0", features = ["derive"] }
main.rs
The other file in our project is the main.rs located within src folder. This is where we define our function code. Overwrite the main.rs with the following content. You can also modify the code to your use case.
use lambda_runtime::{error::HandlerError, lambda, Context};
use serde::{Deserialize, Serialize};
use std::error::Error;

#[derive(Deserialize, Serialize, Clone)]
#[serde(rename_all = "camelCase")]
struct LambdaRequest {
    full_name: String,
    message: Option<String>,
}

#[derive(Deserialize, Serialize, Clone)]
#[serde(rename_all = "camelCase")]
struct LambdaResponse {
    lambda_request: LambdaRequest,
}

fn main() -> Result<(), Box<dyn Error>> {
    lambda!(lambda_handler);
    Ok(())
}

fn lambda_handler(e: LambdaRequest, _c: Context) -> Result<LambdaResponse, HandlerError> {
    let mut e = e.clone();
    e.full_name = format!("Hello {name}!", name = e.full_name);
    let msg = match e.message {
        Some(msg) => format!("Your message is '{msg}'.", msg = msg),
        None => format!("You have no message."),
    };
    e.message = Some(msg);
    Ok(LambdaResponse { lambda_request: e })
}
The above code is a simple Rust function that greets a user with messages. There are two main function – main() and lambda_handler(). In the lines before the functions, we defined two structs – LambdaRequest and LambdaResponse – they respectively define the structure of request payload the function expects and the type of response our function is returning.
Now we have our function defined, if you try to run the code by executing cargo run, the main function will panic with following error.
thread 'main' panicked at 'Could not find runtime API env var: environment variable not found'
, <::std::macros::panic macros>:5:6
note: run with `RUST_BACKTRACE=1` environment variable to display a backtrace
This error occurred because our code expects certain environment variables that exist on AWS Lambda to run. We will resolve it later in this guide.
Testing the Rust Function
Let's write a simple test for our lambda_handler() function. At the bottom of our src/main.rs file, include the following lines:
#[cfg(test)]
mod tests {
    use lambda_runtime::Context;
    use super::{LambdaRequest, LambdaResponse};

    #[test]
    fn test_lambda_handler() {
        let expected_response = LambdaResponse {
            data: LambdaRequest {
                full_name: "Hello Chuma Umenze!".to_string(),
                message: Some("Your message is 'It is a simple test'.".to_string())
            }
        };

        let lambda_context = Context {
            aws_request_id: "0123456789".to_string(),
            function_name: "test_function_name".to_string(),
            memory_limit_in_mb: 128,
            function_version: "$LATEST".to_string(),
            invoked_function_arn: "arn:aws:lambda".to_string(),
            xray_trace_id: Some("0987654321".to_string()),
            client_context: Option::default(),
            identity: Option::default(),
            log_stream_name: "logStreamName".to_string(),
            log_group_name: "logGroupName".to_string(),
            deadline: 0,
        };

        let lambda_request = LambdaRequest {
            full_name: "Chuma Umenze".to_string(),
            message: Some("It is a simple test".to_string())
        };

        // Check the result is ok
        let result = super::lambda_handler(lambda_request, lambda_context);
        assert_eq!(result.is_err(), false, "Error: {}", result.err().unwrap());

        // Confirm the expected values in result
        let value = result.ok().unwrap();
        assert_eq!(value.data.full_name, expected_response.data.full_name);
        assert_eq!(value.data.message, expected_response.data.message);
    }
}
The above code defines a single test case for lambda_handler() function. Execute cargo test to run the test. We should get an output as follows:
Compiling rust_lambda v0.1.0 (/Users/chumaumenze/Desktop/rust_lambda)
    Finished test [unoptimized + debuginfo] target(s) in 1.41s
     Running target/debug/deps/rust_lambda-d2b9fa9d3cb89902

running 1 test
test tests::test_lambda_handler ... ok

test result: ok. 1 passed; 0 failed; 0 ignored; 0 measured; 0 filtered out
Compiling the Rust Project
When configuring a custom runtime, AWS Lambda expects an executable file name bootstrap. The executable should be bundled in your deployment package or lambda layers package. We can configure cargo to build our binary as bootstrap instead of using our package name.
In our Cargo.toml, add the autobins = false to the [package] section, then create a new section called [[bin]] with the key-values name = "bootstrap" and path = "src/main.rs". Your Cargo.toml should have the following structure:
[package]
 ....
autobins = false

[[bin]]
name = "bootstrap"
path = "src/main.rs"
To facilitates easy cross-compilation of packages, we will use rust-embedded/cross. Cross relies on docker to compile our packages to any supported target with minimal setup time.
cargo install crossSpecify docker images cross should use to compile our package.
echo '
[target.x86_64-unknown-linux-gnu]
image = "lambci/lambda:build-provided"

[target.x86_64-unknown-linux-musl]
image = "lambci/lambda:build-provided"
' >> Cross.toml
Now that we have the right setup, let's compile for the AWS Lambda environment. We can achieve this in two ways:
- Making a static build by targeting
x86_64-unknown-linux-musl - Dynamically linking shared libraries by targeting
x86_64-unknown-linux-gnu
Statically Linked Compilation
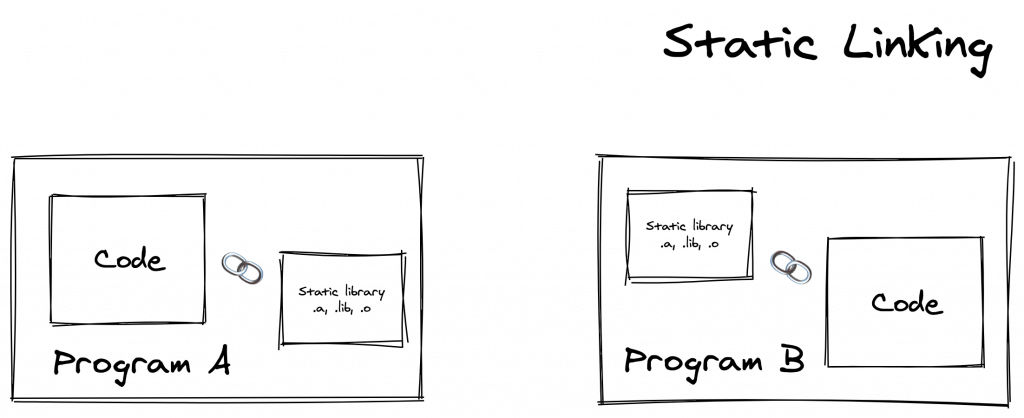
In static compilation, no dynamic linking occurs. All bindings are done at compile time; the linker takes one or more objects, such as a set of routines, external functions and variables from external libraries generated by compilers, and assembles them into a single standalone executable program. During execution, the application is not dependent on any auxiliary module such as dynamically linked libraries (.dll) or shared objects (.so).
Static linking to the libraries that rely heavily on C/C++ code will require some extra hack. See rust-lang/rust#36710 for further explanation.
At the time of writing, the target triple x86_64-unknown-linux-musl has a tier 2 Rust platform support. Targets in this tier are guaranteed to build but are not guaranteed to produce a working build. If your package fails to build using this method, consider dynamic compilation. See the list of Rust platform support here.
# Make a build targeting x86_64-unknown-linux-musl
cross build --target x86_64-unknown-linux-musl --release

# Determine the file type
file target/x86_64-unknown-linux-musl/release/bootstrap
The last output should look like this:
target/x86_64-unknown-linux-musl/release/bootstrap: ELF 64-bit LSB executable, x86-64, version 1 (SYSV), statically linked, BuildID[sha1]=48b9519ccfae9bd613c825165f0dde46567e83e3, with debug_info, not stripped
Dynamically Linked Compilation
GNU/Linux and BSD systems excluding Musl targets uses dynamic linking by default. The Rust compiler also adheres to this when compiling for their targets. Unlike static compilation, a dynamically linked executable depends on external libraries and shared objects that are dynamically loaded at runtime. Since objects are store separately, there may be a compatibility problems if your package or required library was compiled by a newer version of compiler. When that happens, Lambda would raise a RuntimeError with a message similar to the following:
/var/task/bootstrap: /lib64/libc.so.6: version `GLIBC_2.18' not found (required by /var/task/bootstrap)
Let's make a dynamic build:
# Make a build targeting x86_64-unknown-linux-gnu
cross build --target x86_64-unknown-linux-gnu --release

# Determine the file type
file target/x86_64-unknown-linux-gnu/release/bootstrap
The last output should look like this:
target/x86_64-unknown-linux-gnu/release/bootstrap: ELF 64-bit LSB shared object, x86-64, version 1 (SYSV), dynamically linked, interpreter /lib64/ld-linux-x86-64.so.2, for GNU/Linux 2.6.32, BuildID[sha1]=9e61a11646f347bf3be0259362d9077b2d4b4925, with debug_info, not strippedFor the remainder of this guide, we will be working with x86_64-unknown-linux-gnu target. Be sure to change the target triple to match your use case.
Deployment
Before deploying our bootstrap, we will first, manually test our build in a sandbox environment using Docker and docker-lambda images to replicate AWS Lambda. This gives us an additional benefit to test offline, avoid incurring request charges, and also the assurance that our function will run on Lambda with no issues.
docker run --rm \
-e DOCKER_LAMBDA_STAY_OPEN=1 -p 9001:9001 \
-v "$PWD"/target/x86_64-unknown-linux-gnu/release/bootstrap:/var/task/bootstrap:ro,delegated \
lambci/lambda:provided main
On a separate terminal window, invoke the:
aws lambda invoke \
--endpoint http://localhost:9001 \
--no-sign-request --function-name=rust_lambda \
--invocation-type=RequestResponse \
--payload $(echo '{"fullName": "Martin Luther", "message": null}' | base64 ) \
output.json
The response from the function will be written to the file output.json.
Uploading the Function
Now that we are certain our function works as expected, let's zip it up and upload it. The next command adds our bootstrap to a zip file bootstrap.zip.
zip -r9 -j bootstrap.zip ./target/x86_64-unknown-linux-gnu/release/bootstrapBefore creating a lambda function, we need to create an execution role for the function. The execution role is a set of permissions that defines what our function should be able to do.
# Create an IAM Role lambda-basic-execution.
aws iam create-role \
--role-name lambda-basic-execution \
--assume-role-policy-document '{
    "Version": "2012-10-17",
    "Statement": [
        {
        "Effect": "Allow",
        "Principal": {
            "Service": "lambda.amazonaws.com"
        },
        "Action": "sts:AssumeRole"
        }
    ]
}'

# Attach AWSLambdaBasicExecutionRole to the role.
aws iam attach-role-policy \
--role-name lambda-basic-execution \
--policy-arn arn:aws:iam::aws:policy/service-role/AWSLambdaBasicExecutionRole
In this case, we created a role called lambda-basic-execution and attached the policy AWSLambdaBasicExecutionRole to it. The AWSLambdaBasicExecutionRole is a policy created by AWS which defines the most basic permissions for a Lambda function – writing logs to AWS CloudWatch.
Next, we create a lambda function called rust_lambda with a custom runtime which has the execution role of lambda-basic-execution and uses our zipped bootstrap.
# Create a Lambda function with our custom bootstrap.
AWS_ACCOUNT_ID=`aws sts get-caller-identity --query Account --output text` && \
aws lambda create-function \
--function-name rust_lambda \
--runtime provided \
--role arn:aws:iam::$AWS_ACCOUNT_ID:role/lambda-basic-execution \
--zip-file fileb://bootstrap.zip \
--description "Simple Rust function" \
--timeout 5 \
--handler main
Once our function is deployed successfully, we can run the function by executing:
# Test the deployed function
aws lambda invoke \
--function-name=rust_lambda \
--invocation-type=RequestResponse \
--payload $(echo '{"fullName": "Martin Luther", "message": null}' | base64 ) \
output.json
You should get the following response:
{
    "StatusCode": 200,
    "ExecutedVersion": "$LATEST"
}
And a new file called output.json with the following content:
{"data":{"fullName":"Hello Martin Luther!","message":"You have no message."}}And That's It!
I hope this guide has helped you learn Rust and how you can deploy Rust functions to AWS Lambda. You can have a lot of fun building awesome things with this.

