How I ended up publishing Private NPM Packages on Github? My story can help you learn how to create NPM private package and add it to the Github NPM registry.
While working on a project based in Nuxt recently, I needed to separate some application-level logic into a separate Nuxt module so it can be managed independently and re-used in other applications.
This should be simple, but I had to make the package private, which gave the development of a new module a significant amount of steer in a different direction.
In this article, I'll discuss the issues I faced while publishing this package on the Github package registry as a private npm package, as well as how to use a private package in another project. This article doesn't cover how to create a Nuxt module.
Let's dive in!
Table of contents
Private Repositories Equal Private Github Packages
We'll begin by first making our modules repository private. If your repository is already private, then you can skip this step.
A private repository will be published as a private npm package.
Perhaps the first step in making your package private is to make your package's repository private.

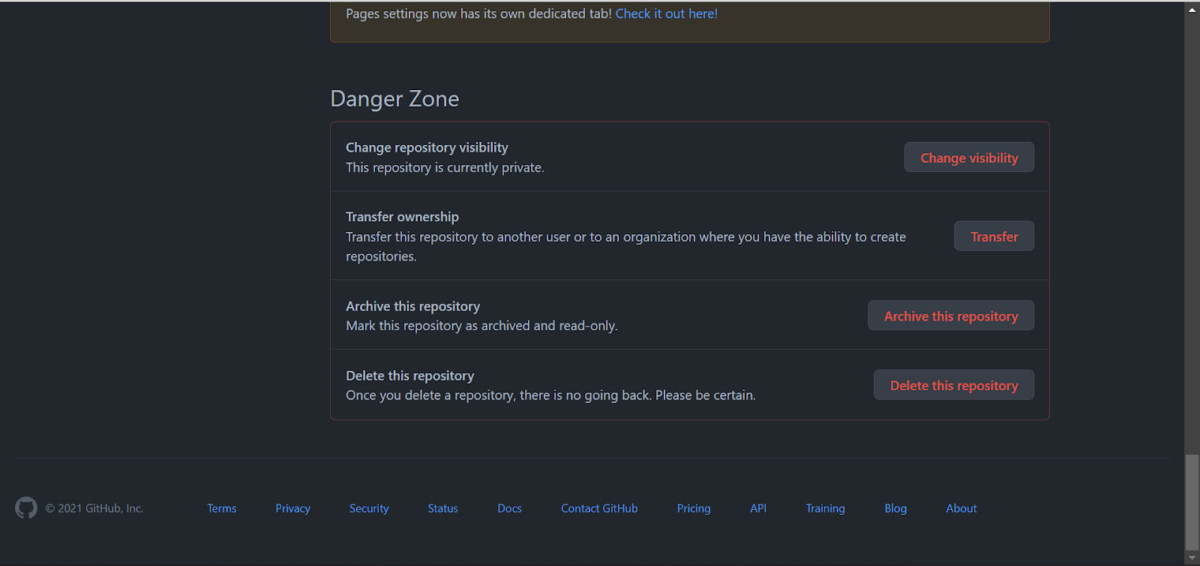
To make your Github repository private, click on the Settings tab, scroll to the bottom and then click on Change repository visibility. Only do this if your repository isn't already private.

Create a Github Personal Access Token
If you’ve used Github a lot recently, you must have seen the notices about passwords being deprecated in favor of a more secure access token. Github started sending emails to people who were still using the basic authentication method of a username and password since late 2020. It’s likely you must have seen one of them that looked like this:
On September 29th, 2020 at 13:37 (UTC), you used a password to access an endpoint through the GitHub API using python-requests/2.18.4:. Basic authentication using a password to the API is deprecated and will soon no longer work. Visit this site for more information around suggested workarounds and removal dates.
Github Personal Access Tokens (PATs) are an alternative to using passwords for authentication to GitHub when using the GitHub API or the command line. (Github docs)
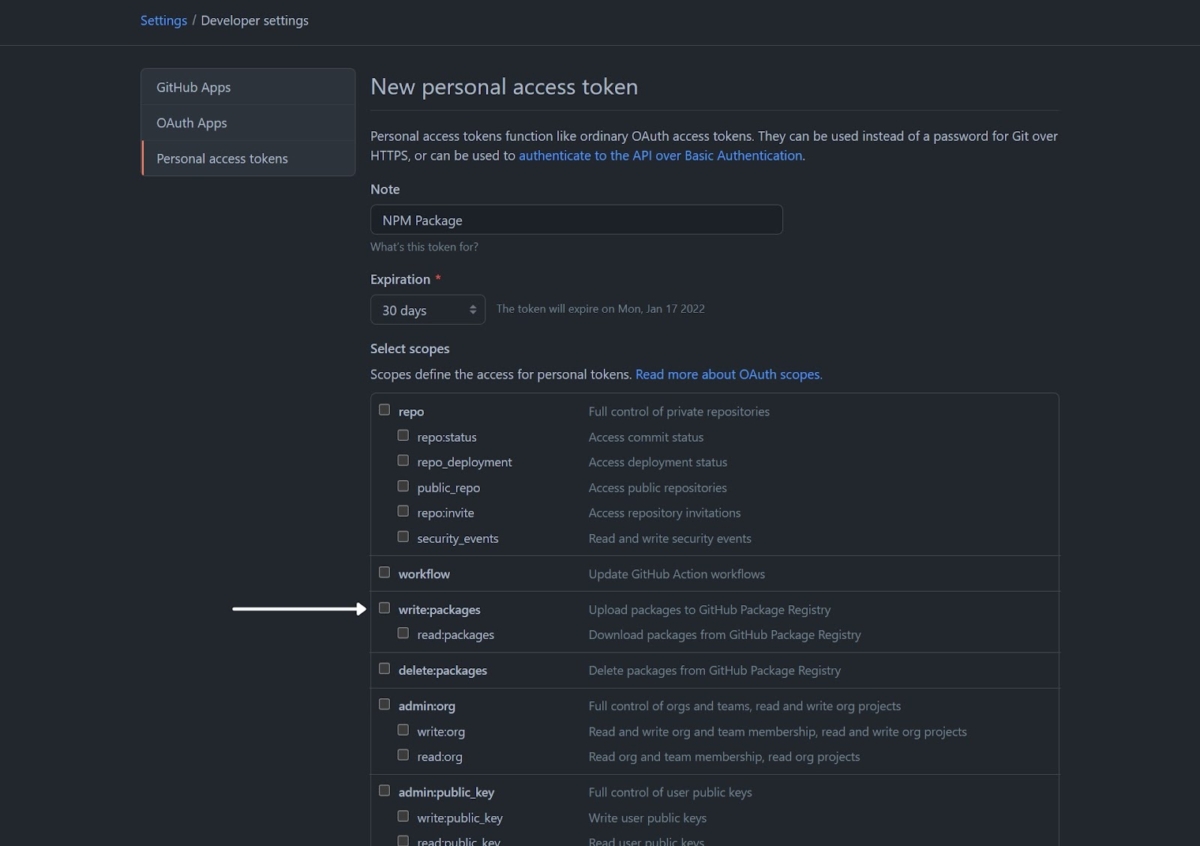
To generate a new token to create Github private NPM package, go to your developer settings page and click on Generate a new token:

We need a token with the write:packages scope; we'll select to keep the default expiration date of 30 days:

Copy and store your token in a secure place as we will be using it for the rest of this tutorial. If you lose it, Github will not show it to you again and so you will have to destroy it and create a new one:

Authenticating With NPM Using Github Registry
To publish private npm packages, you need to authenticate with npm via the Github package registry. There are two methods to do this: you could either use a .npmrc file to authenticate or use the command line. In this tutorial, we will use the two methods; we will use the command line to create our package while we will use .npmrc when using our package in a hosted project.
Using the command line authenticates your development environment to connect with the github private npm registry, and it's sufficient for when you're developing your package. Still, you need the .npmrc file when deploying your package to authenticate in your production environment. We will go into the details shortly.
Authenticate With Command Line to Create Our Package
To do this, run the command below, which will prompt you to respond with your Username, Email, and Password (use your generated token here). We are authenticating with the Github package registry npm using our Github account details and our token generated in the previous steps. --scope here is a unique identifier for a group of packages as introduced in NPM v2.
A scope can be attached to a registry, and so every package published under that scope assumes that same registry, by default --scope will assume the official NPM registry. In our case, we want that to be the Github package registry, and so in the command below, we have provided a --registry flag to point at https://npm.pkg.github.com.
npm login --scope=@OWNER --registry=https://npm.pkg.github.comA scope here may be your GitHub username or your Github organization's username; once your package is published, the users of your package can install it like that: npm install @scope/package.

After running the command above, you should have the message: Logged in as goodhands to scope @goodhands on https://npm.pkg.github.com/ if your authentication was successful.
Publish Your Package
If you've made it to this point, congratulations, you rock!✨
Now, it's time to publish a private npm package, and we will take a look at a few checklists to make this process as smooth as possible.
This tutorial doesn't involve creating a Node.js package, so I expect you already have a package before reading this tutorial.
Checklist 1: Make Sure Your package.json Has the Right Name
While setting up our development environment, we created a scope and attached that to a registry. Now, for your package to go to the right place once published, which is https://npm.pkg.github.com/, you need to use the same scope you authenticated with as your package name:
{
  "name": "@goodhands/private-module",
  "version": "1.0.0",
  "description": "An example package",
  "main": "index.js",
...
Since I have used the @goodhands scope to authenticate, I’ll have to add that name to my package.json.
Now you should save your changes, commit and push to Github.
Checklist 2: Semver
Version control in a regular project may not really require much attention being paid to major, minor, or patch changes, according to semver.org. However, since we're publishing a package that will be used and relied on by other applications, it’s quite important to uphold the right conventions.
A tool I’ve found useful for automating this is the standard-version package that automates versioning to comply with semver standards and generates a CHANGELOG.md based on Conventional Commits.
To aid swift releases, tagging, and updating the changelog, I have the standard-version command, and a mix of Git and npm commands attached to a script in my package.json:
"scripts": {
    "release": "standard-version && git push --follow-tags && npm publish"
}Remember: you will have to install standard-version as a devDependency in your project before you can use it as a script.
To add standard-version to your project, simply run npm install -D standard-version@latest in the root of your project.
Our release script which is attached to the following code: standard-version && git push --follow-tags && npm publish will go through these steps:
The first part of that script which is standard-version will:
- Add all newly edited files
- Create a tag with the latest version of our project
- Create a changelod.md with the recent commits we’ve had
The second part which is git push –follow-tags is the regular git push you may already be used to, but the –follow-tags part will ensure it pushes all newly created tags attached to the current commit.
The final part of our script which is npm publish will publish your latest version of the package to the registry.
If your package was published successfully, you should see similar output in the logs:
npm notice
npm notice package: @goodhands/private-module@1.0.2
npm notice === Tarball Contents ===
npm notice 38B  index.js
npm notice 744B package.json
npm notice 307B CHANGELOG.md
npm notice === Tarball Details ===
npm notice name:          @goodhands/private-module
npm notice version:       1.0.2
npm notice package size:  690 B
npm notice unpacked size: 1.1 kB
npm notice shasum:        e5432314e2[...]55f01523183
npm notice integrity:     sha512[...]qANw
npm notice total files:   3
npm notice
+ @goodhands/private-module@1.0.2
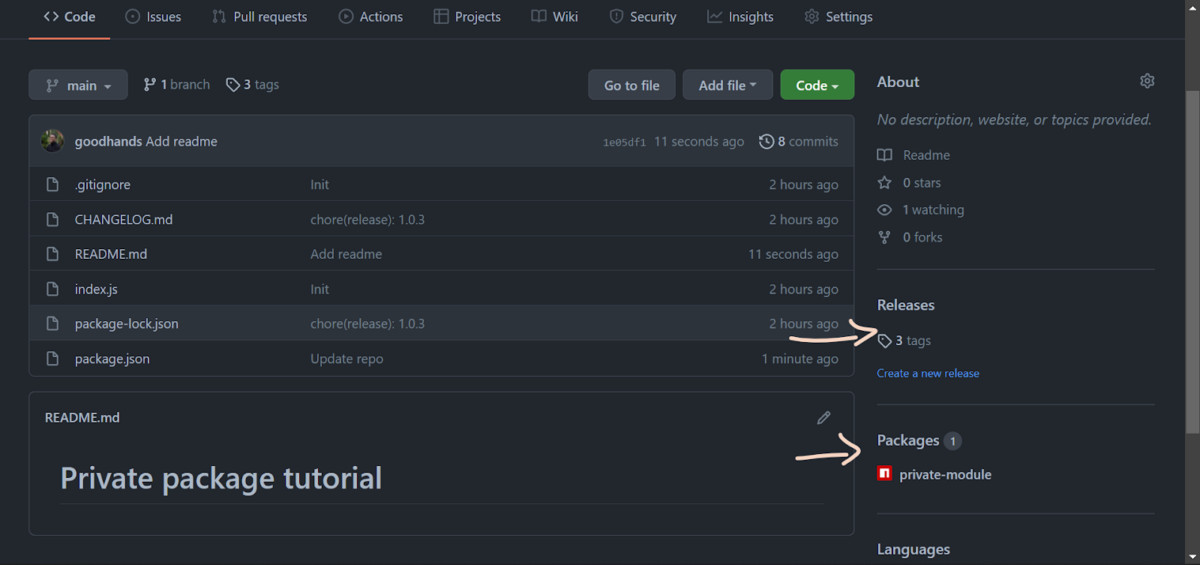
Now, if you visit your package repository on Github, you should see the tag you have created, as well as the package link:

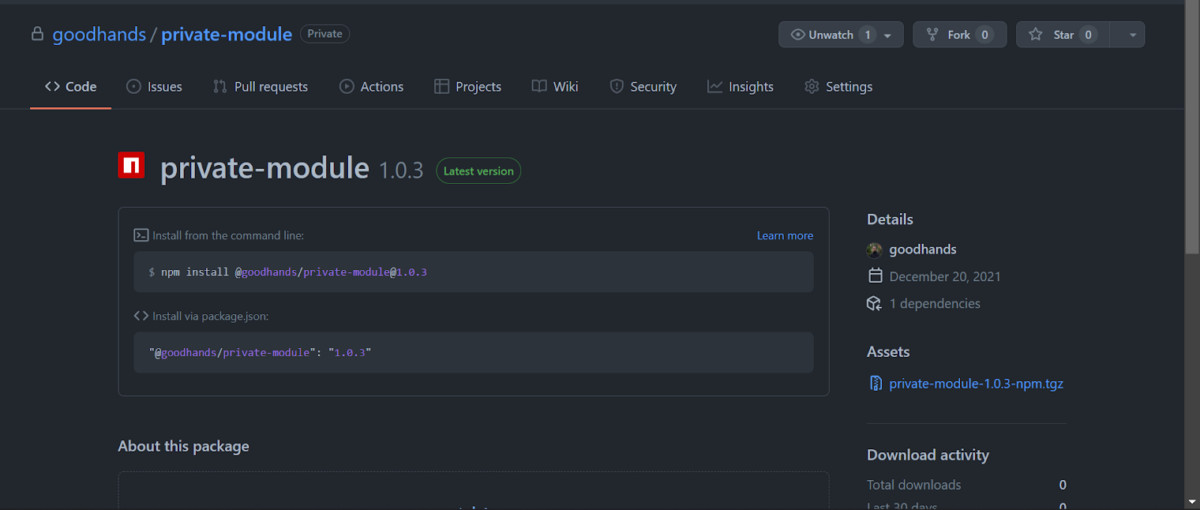
If you click on your package link, you'll find more details about your package, including the installation command, total downloads, previous versions, etc.:

Using Your Private Package in Another Project
To use your package in another project, before installing the package, you need to first create an .npmrc file using the following details:
@goodhands:registry=https://npm.pkg.github.com
//npm.pkg.github.com/:_authToken=${NPM_TOKEN}
Again, @goodhands here is the scope we have attached to the Github package registry, while NPM_TOKEN is the token required to use your package in another project. NPM_TOKEN will be stored in your environment variable in production, while in development you want to store that in a .bashrc file or similar depending on your OS. That way you can use the same token to authenticate multiple projects without having an .env file in each of them.
Personal Packages vs. Organization Packages
There's little difference between the processes it takes to publish a personal package over an organizational one. For NPM private packages, the only person who can use them is you. Using the same token you authenticated with while creating the package, you will have to replace NPM_TOKEN in any project you wish to use the package in. You can do that via a .bashrc file.
For organizational packages, which means that your --scope flag referenced an organization on Github and the package’s repository is also under the same organization, then every software developer within the organization who has access to the repository will be able to use the package in another project.
Installing Your Package in an External Project
Just like any other npm package, you just have to install it by running the command which points to your package name and the preferred version:
npm install @goodhands/private-module@1.0.3Hosting on Netlify or Heroku
When your project, which uses your package, is hosted on a platform like Netlify or Heroku, you simply have to add NPM_TOKEN to the environment variables. Use the same token you have used to authenticate while creating the package. You will be able to use your package successfully.
Final Word
Perhaps the highlight of creating a private package and publishing with the Github registry is primarily about providing the Github registry as the registry when authenticating with NPM in the steps we've gone through in the article.
You'd have to make sure your repository is private. Once that is, it sets an authentication framework where you have to tell Github your identity by using a token generated from your developer settings page, which must also have the packages permission.
Now authenticating other developers in your organization (if you're creating a package as an organization) is as simple as inviting them to your organization. Then they can also generate a token that can authenticate them.
Good luck!


